Logitech Sustainable Packaging Redesign
Case Study: Logitech Headset Sustainable Packaging Redesign Project by Jen Leheny.
This was a university project for a Packaging Design and Communication class that I completed as part of the Bachelor of Visual Communications degree at the University of Canberra. I was required to design and create a physical prototype of a sustainable packaging solution for a commercial product of my choice, with a strong focus on the visual design, the target audience, and the ecological impact of the materials and manufacturing processes.
I chose to redesign the packaging of the Logitech H110 Headset, and the finished prototype is shown below, with a look into the process to follow.
After 30 years, Logitech recently went through a rebranding with design.studio, so I didn’t see the need to update their design assets for this project. I leant into the strong blue and kept the design clean while meeting the requirements of the brief.
The project deliverables included physical protoytpes of the product’s redesigned inner packaging, the outer packaging for the retail shelf, and the shipping box with required shipping labels. The requirements included environmental sustainability, visual design, and the customer experience, with a focus on the ‘unboxing’ experience.

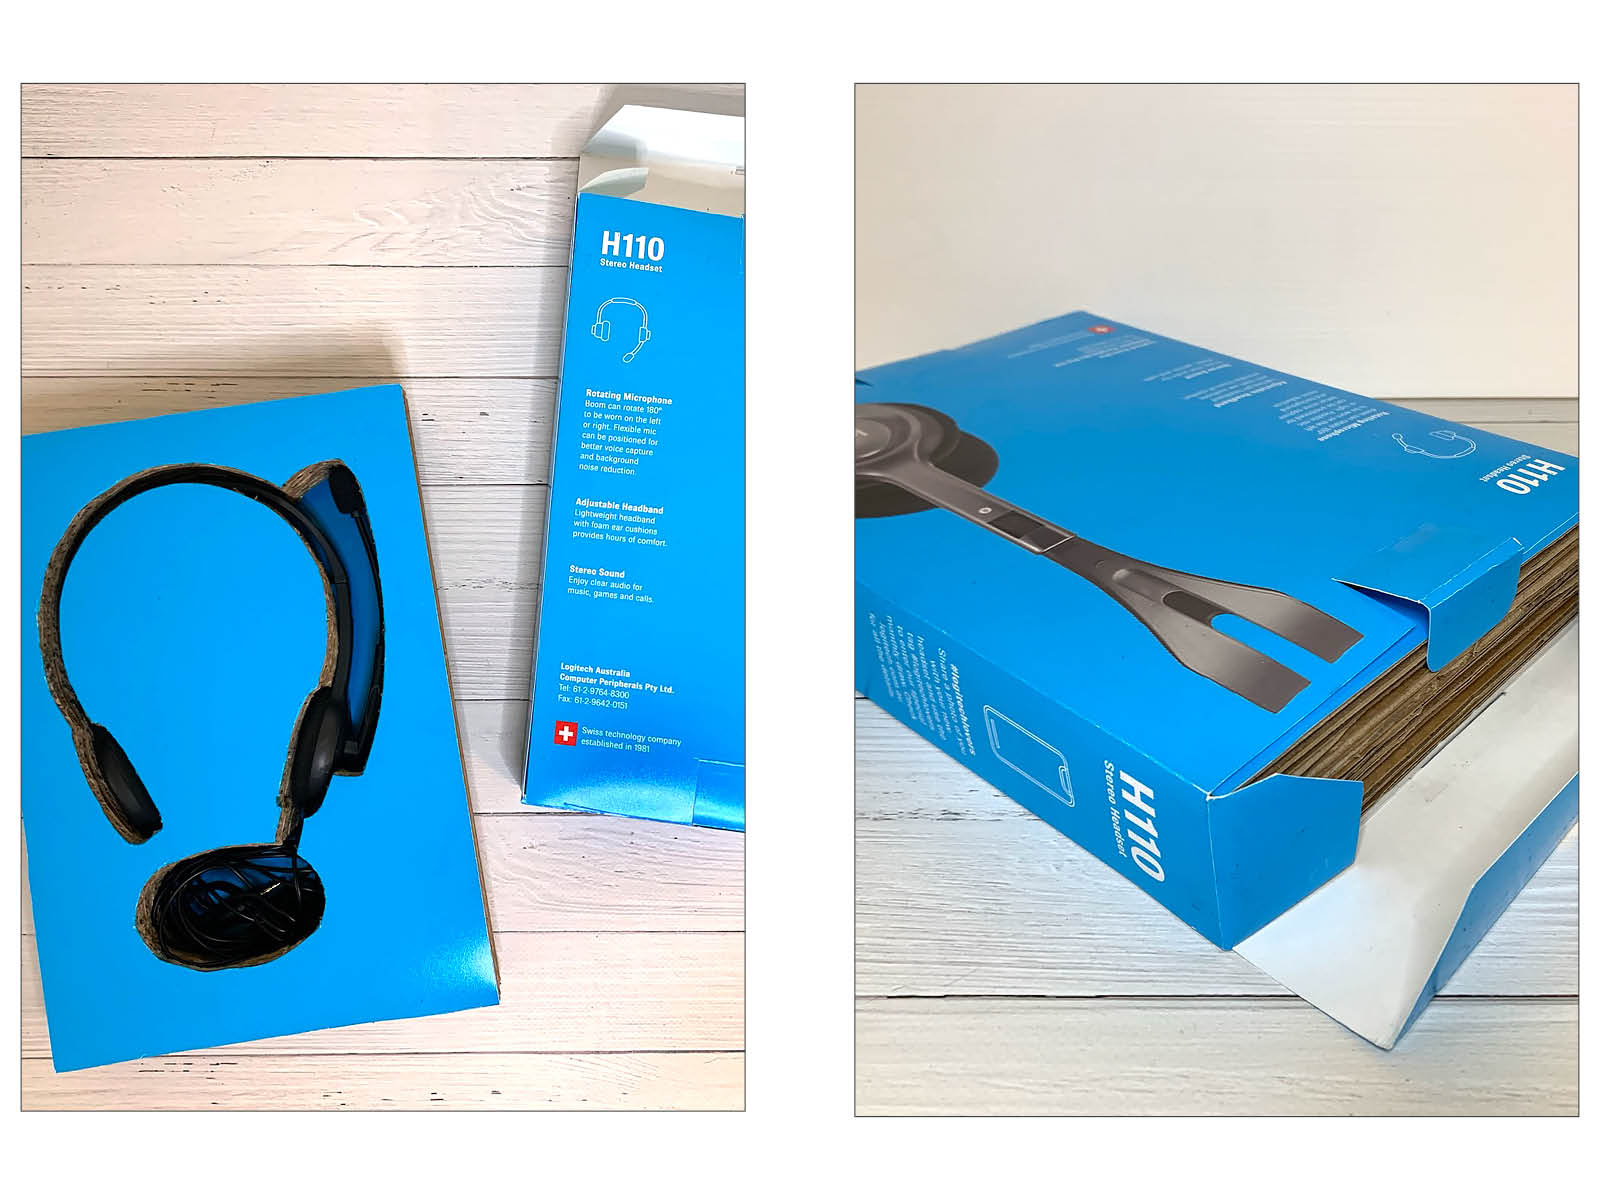
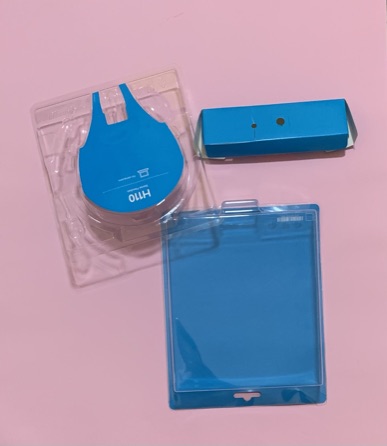
I chose this product to focus on as I had recently bought the Logitech H110 On-Ear Headset and I was left with a lot of injection molded PET plastic waste after opening the package.
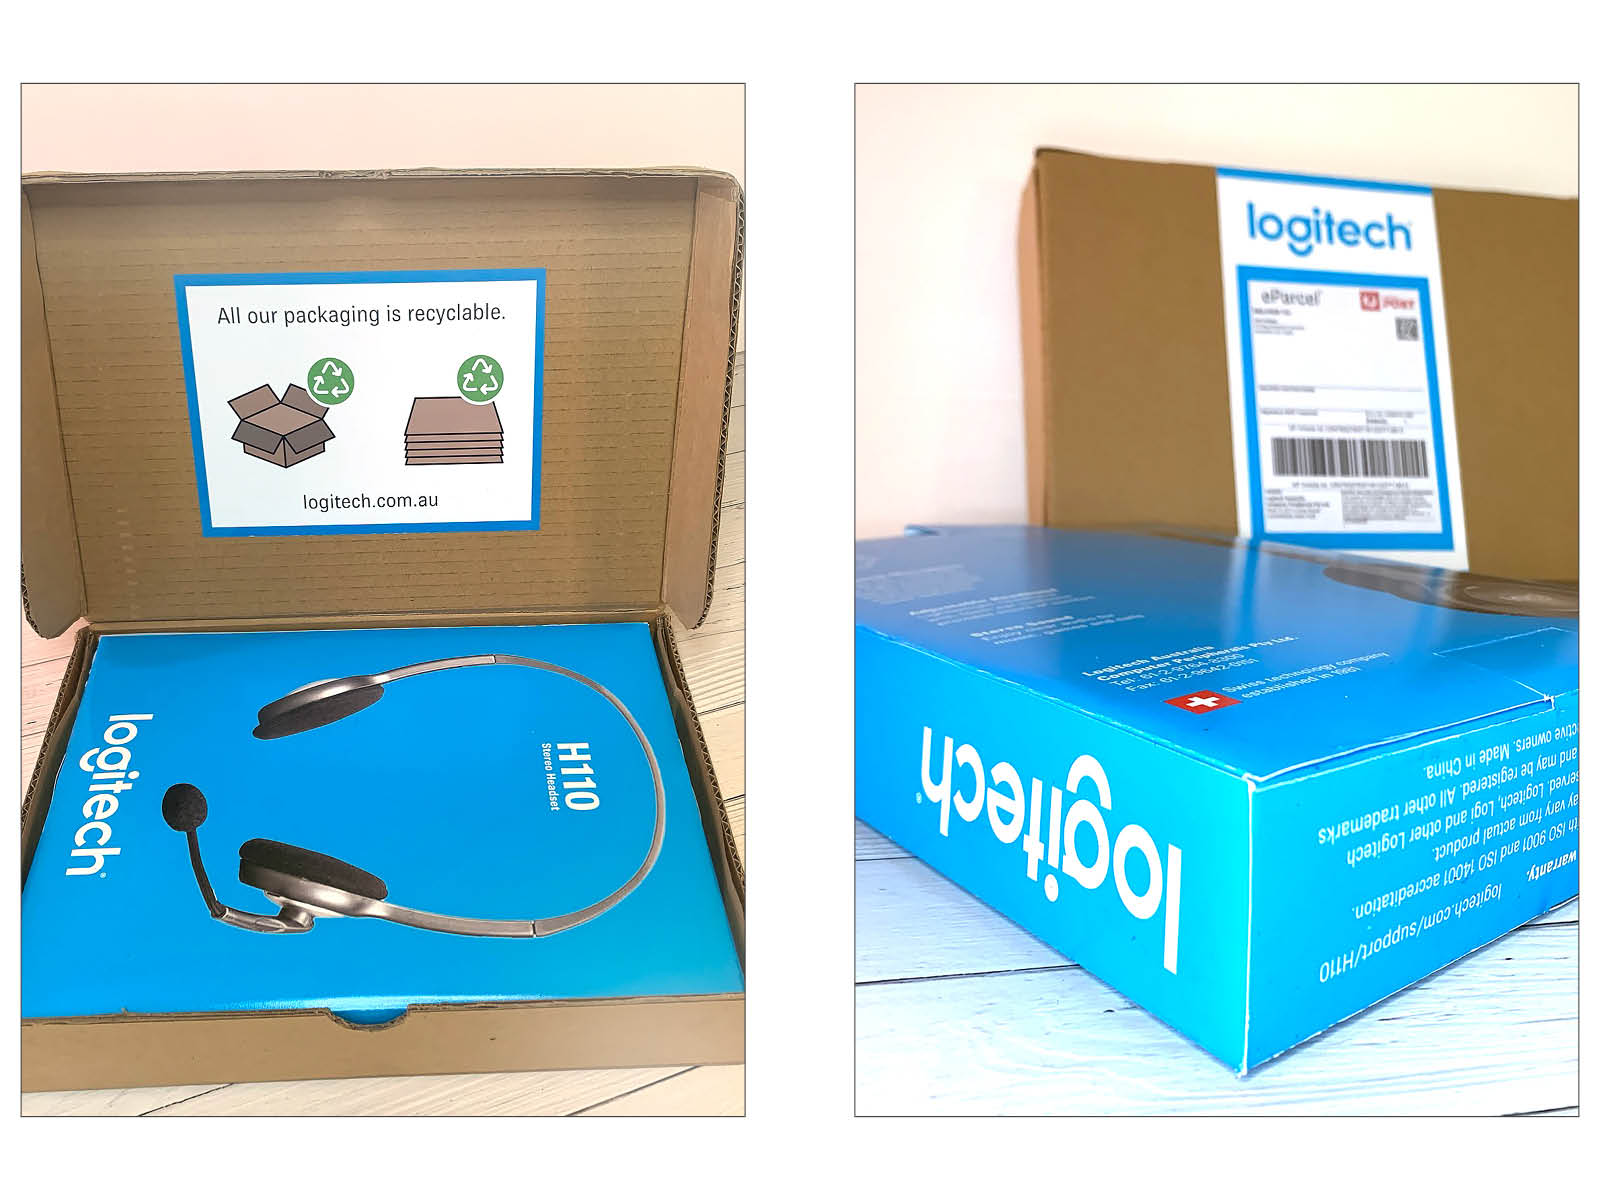
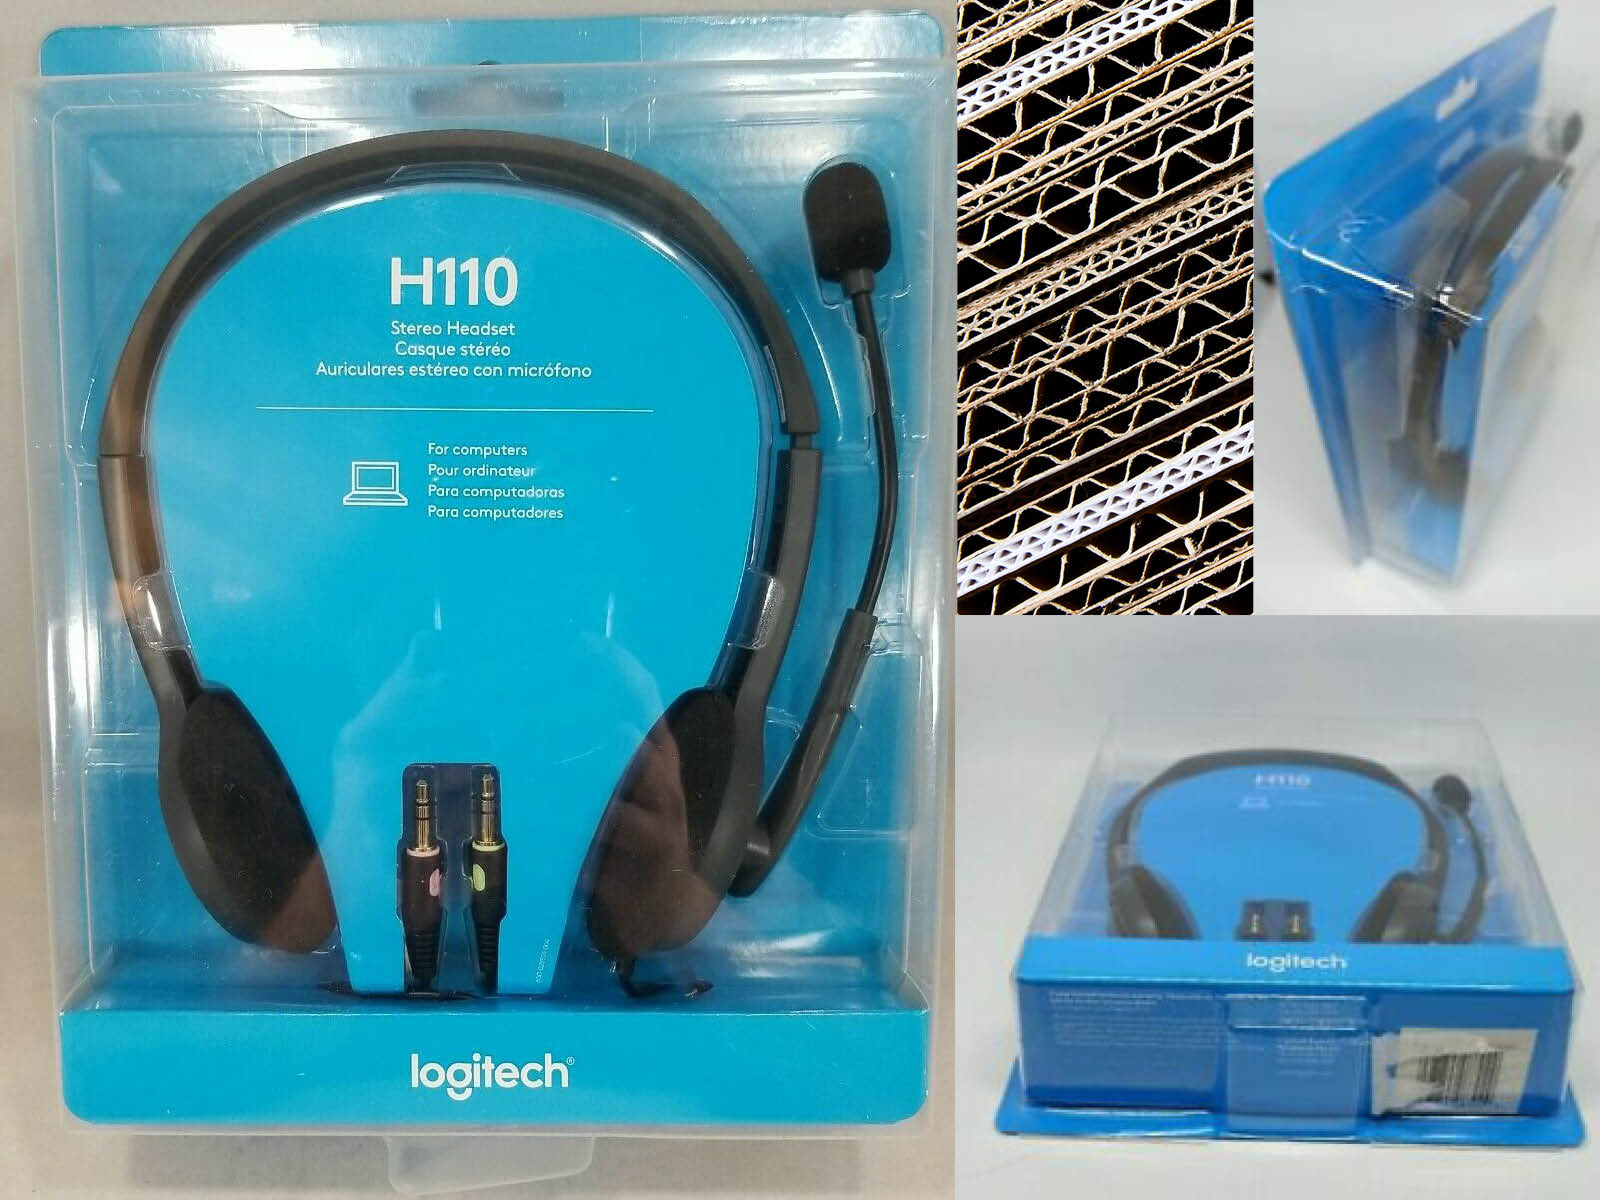
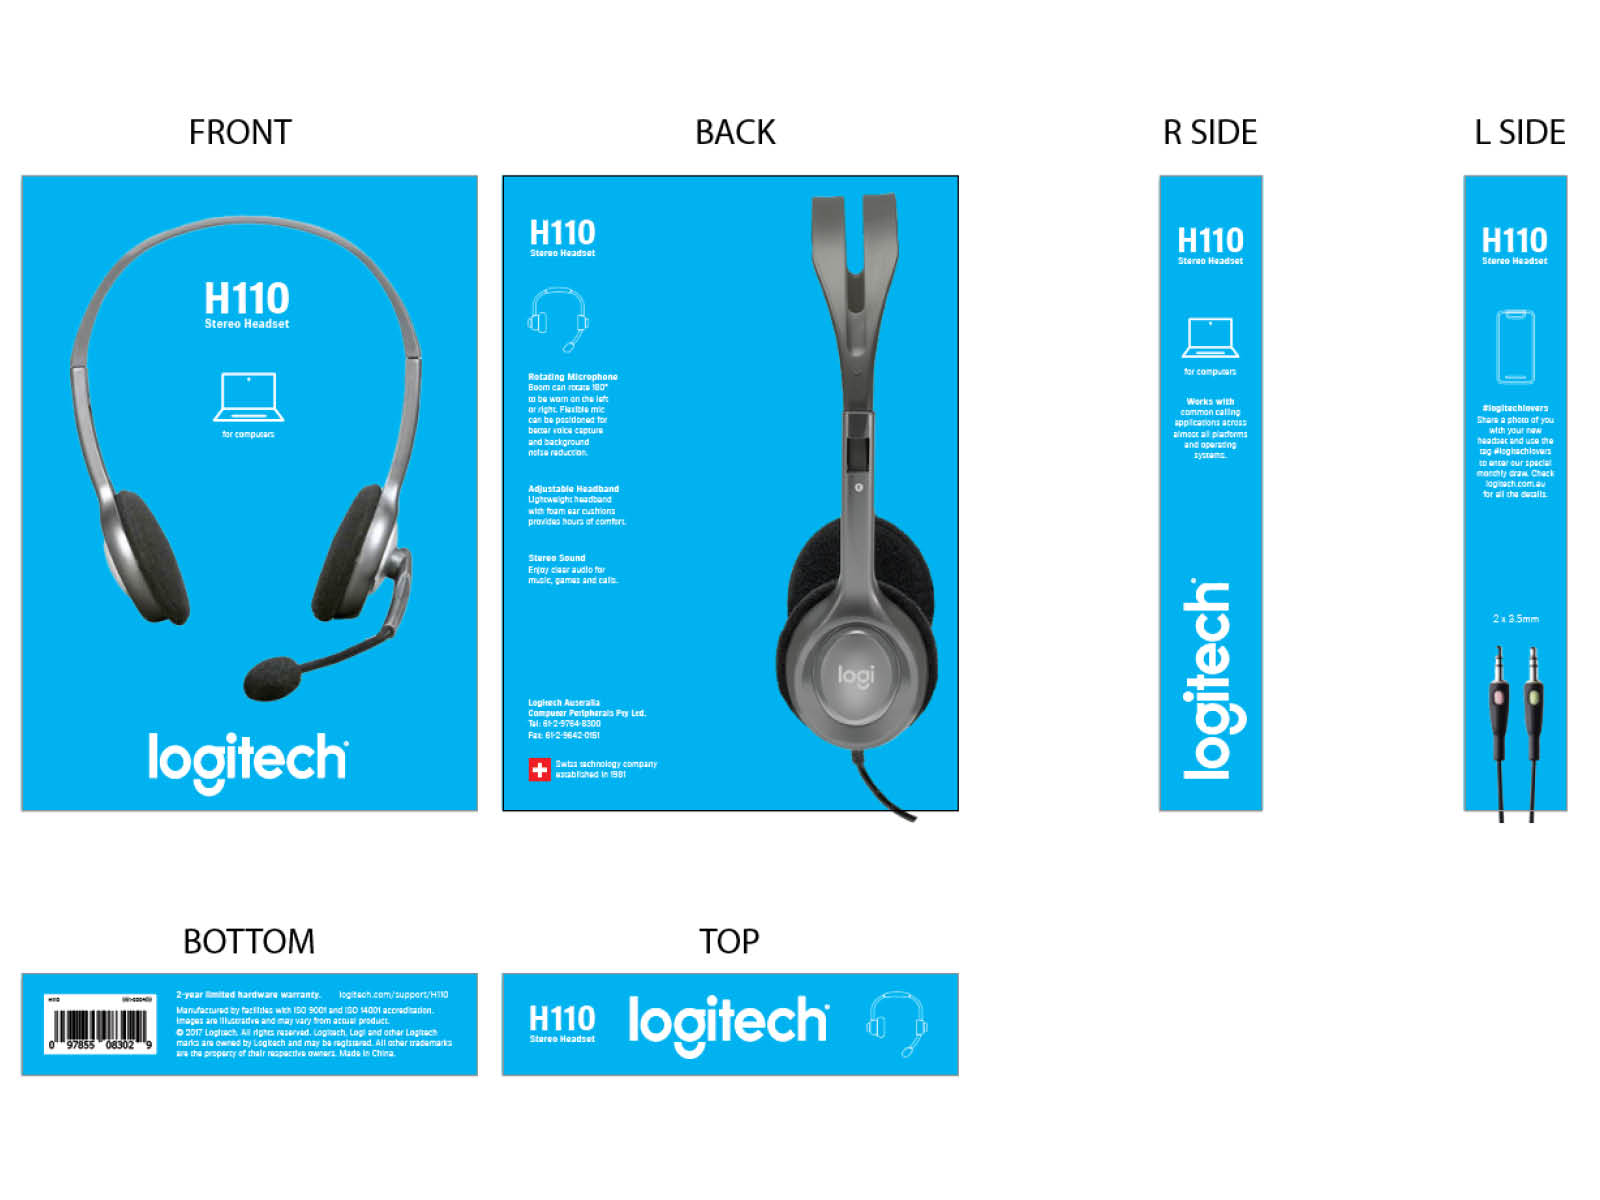
Below is a shot of the original packaging for the Logitech H110 On-Ear Headset, AU$39.95 at Officeworks. Once the packaging has been opened, there is no use for the plastic pieces or the cardboard parts, so my project was to design a sustainable packaging solution suitable for a low cost item.
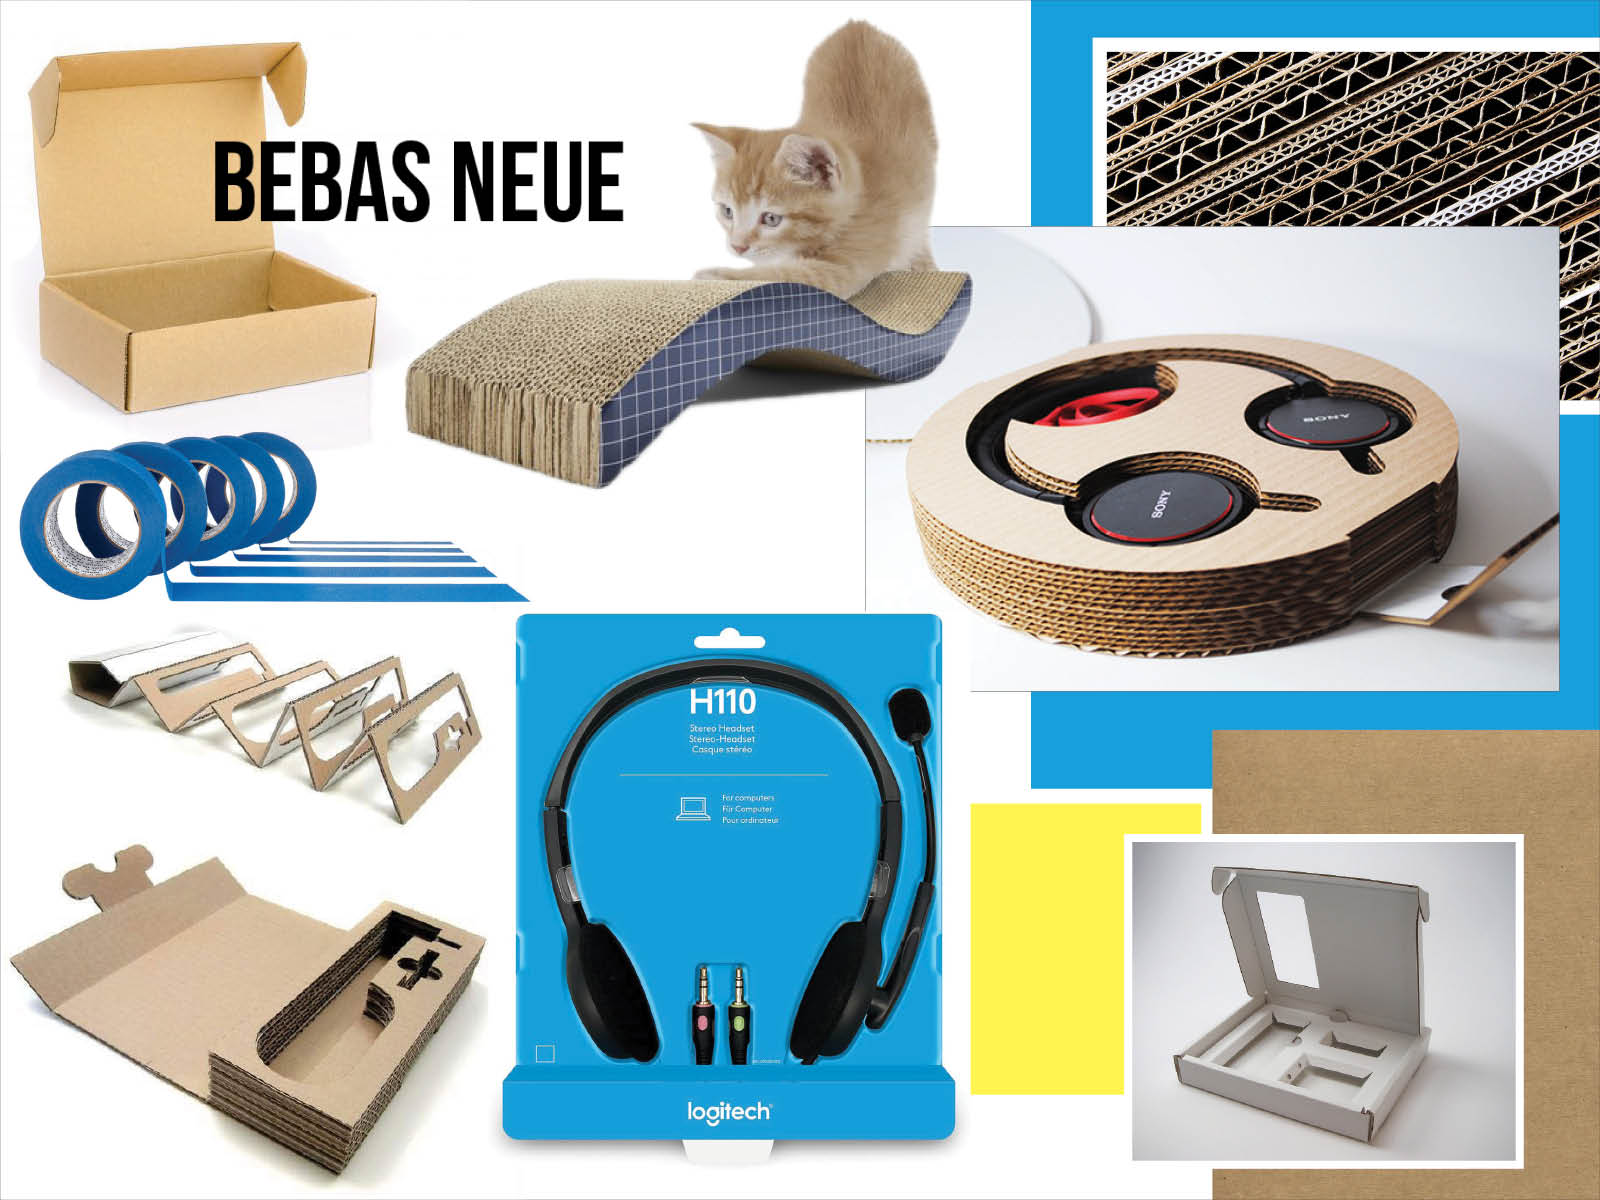
I started by creating a moodboard (below) for the Logitech headset sustainable packaging redesign.
This shows the starting inspiration for my idea – a product I had previously purchased for my cats, the Cat Scratcher Wave, which is a simple and cheap design made from glued layers of corrugate.
Once I settled on my idea, I did further research into corrugated cardboard designs and headphone packaging, and came across a great looking similar project that was done in 2014 by UK Graphic Designer, Sean Giles, shown top right in the moodboard below.
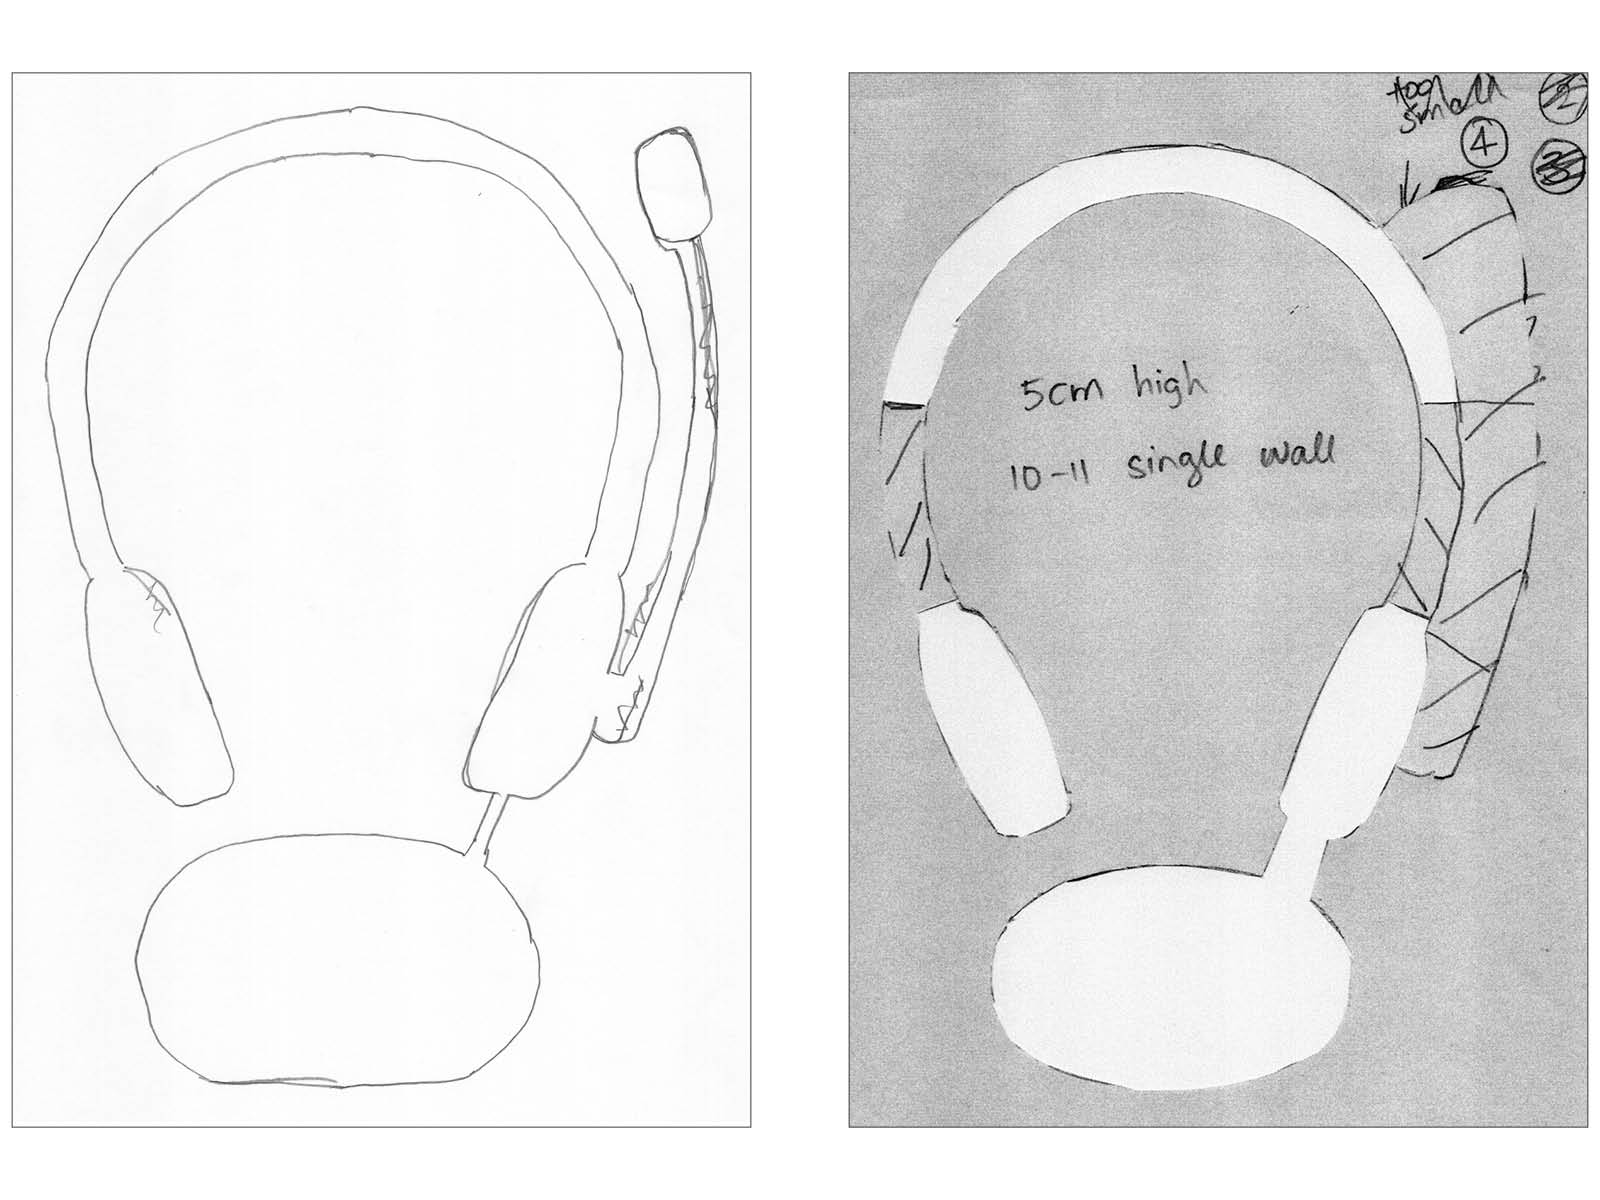
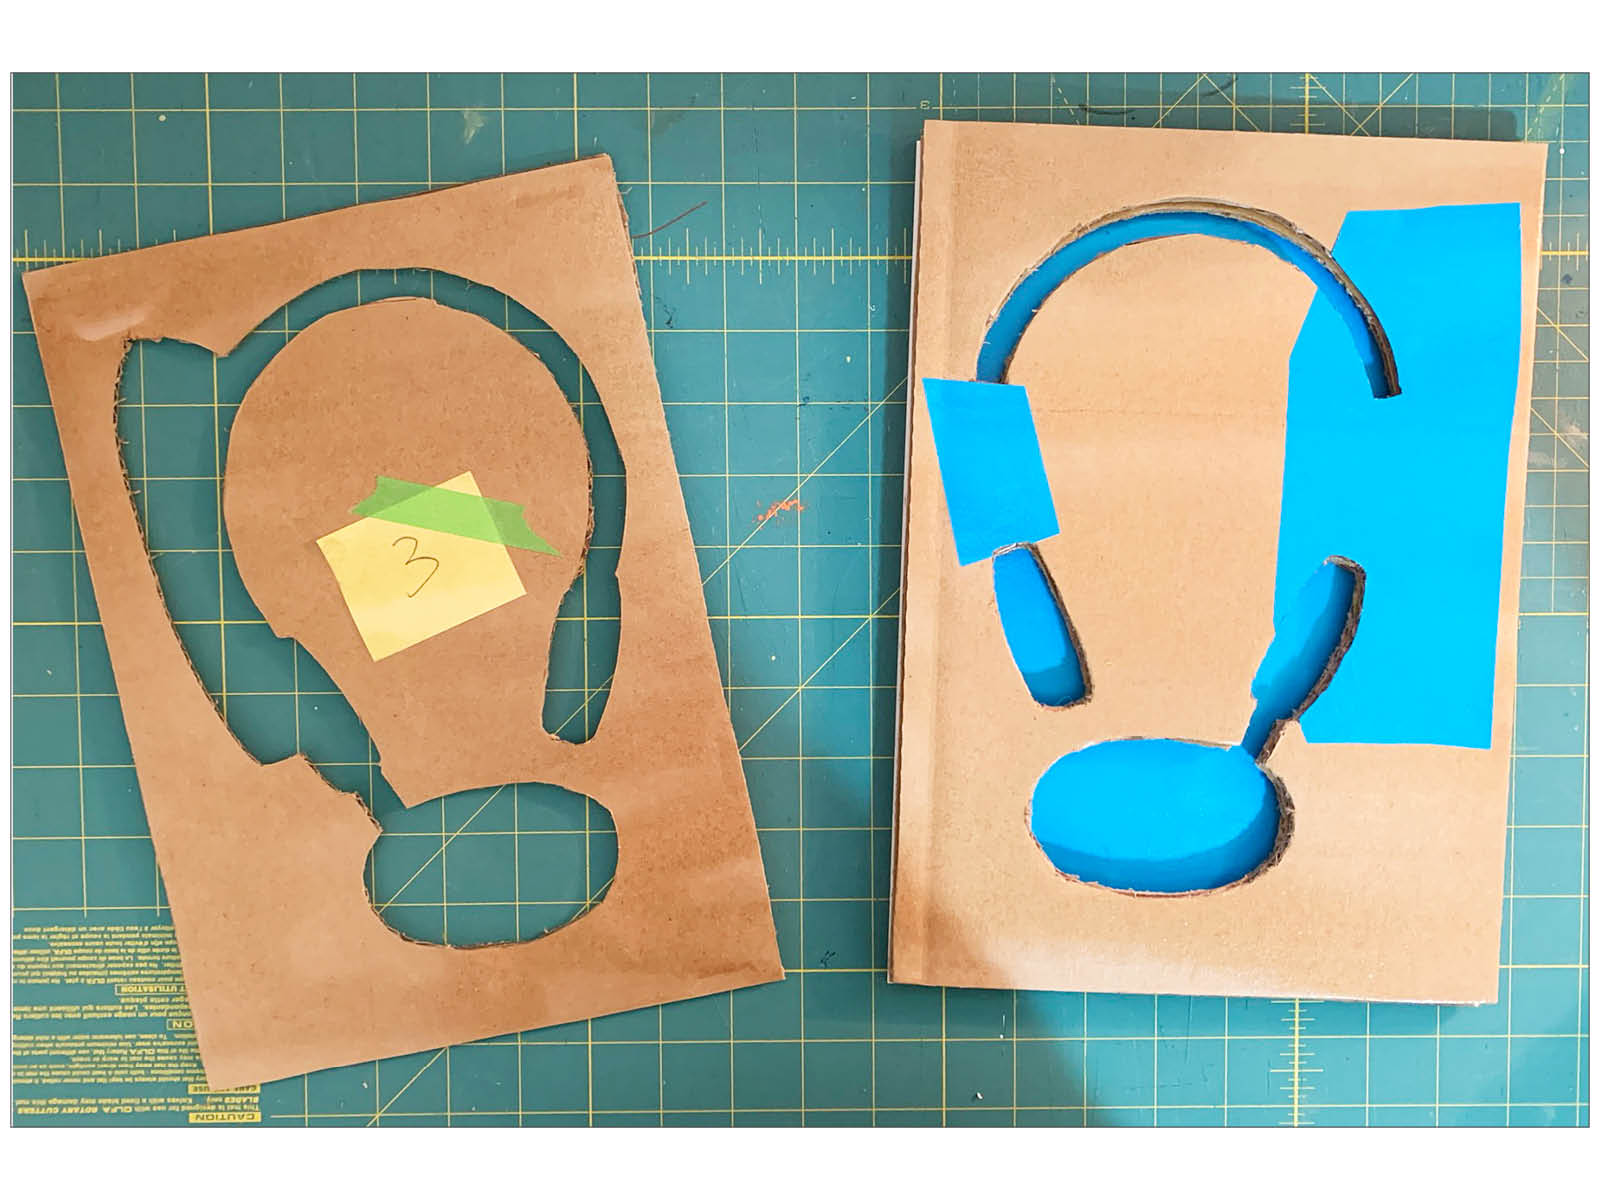
I began collecting clean corrugated cardboard and prototyping my idea, stacking the sheets together. I traced the around the actual headset, adding the oval shape at the bottom to allow for storage of the cords, shown in the first image below. The second image (below left) shows the initial stage of working out the shape and height of the corrugate stack required to enclose the headset.
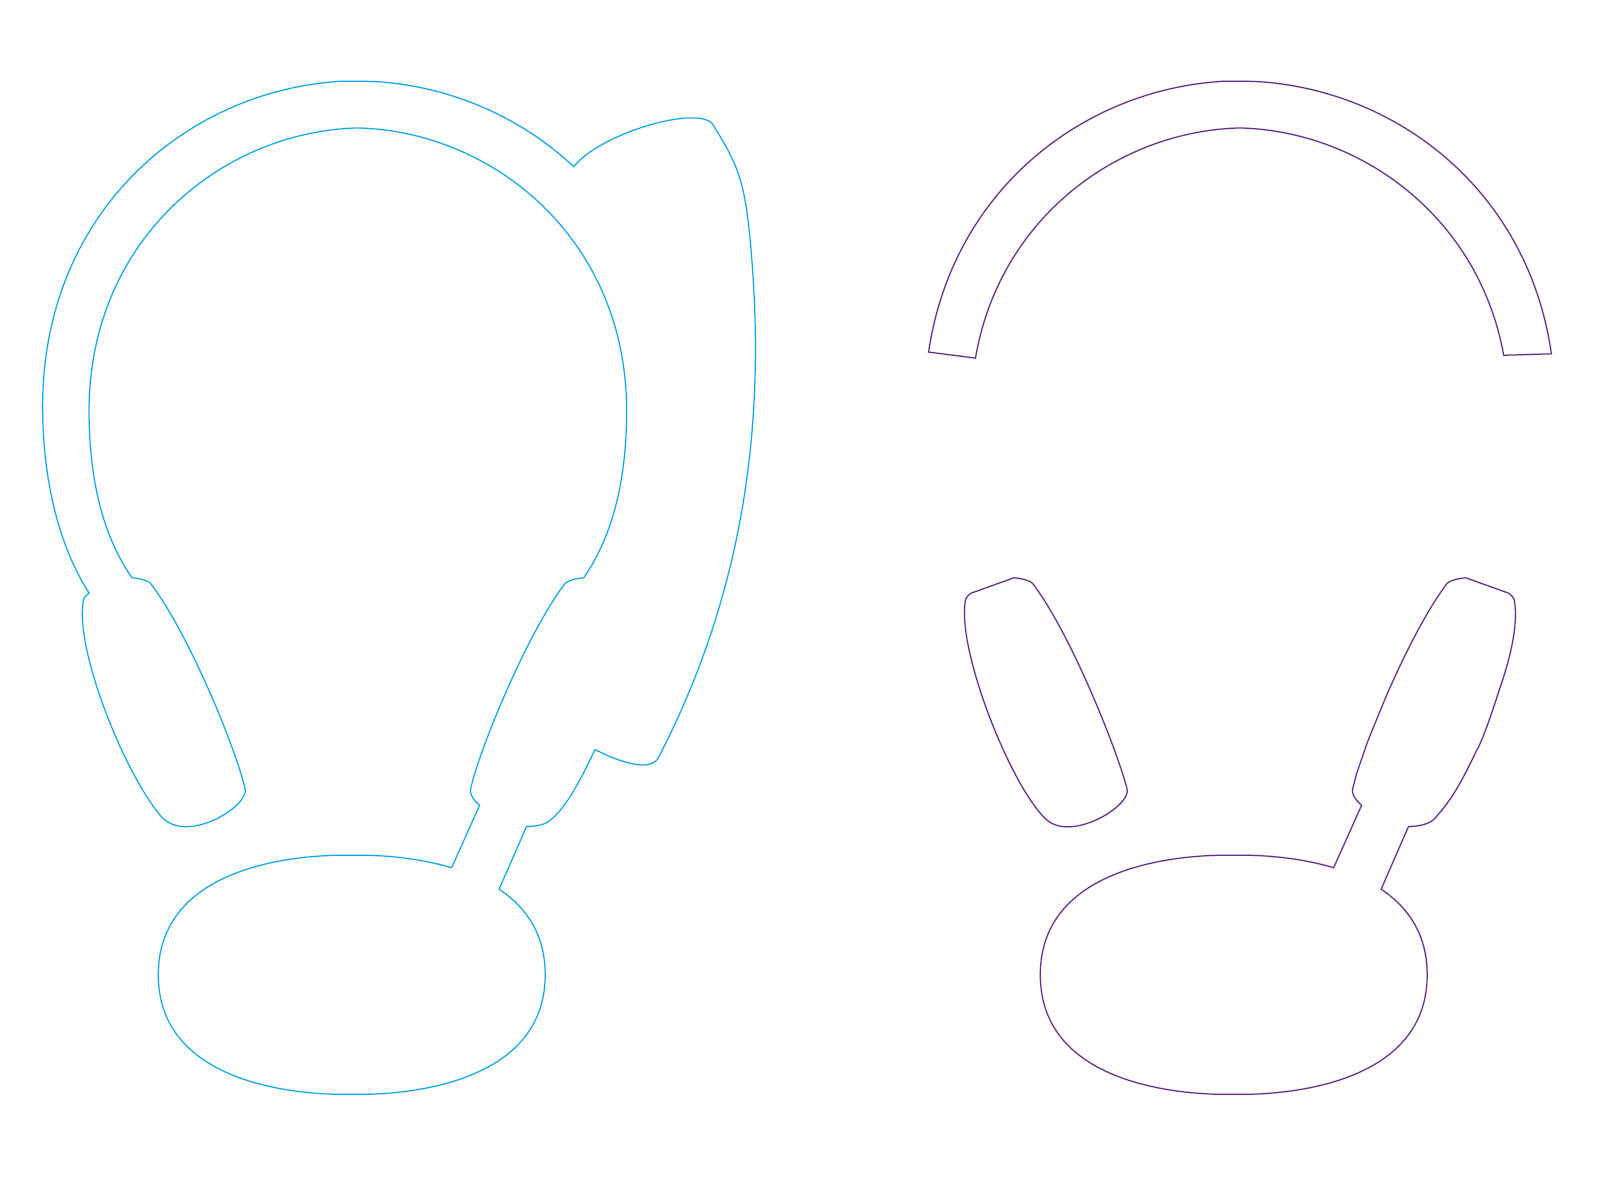
Next I cleaned the sketches up in Illustrator, shown in the two image below right. The blue shape is the cut out for the majority of the layers, with the purple shape showing the cutout for some lower layers, where certain parts of the headset have more height.
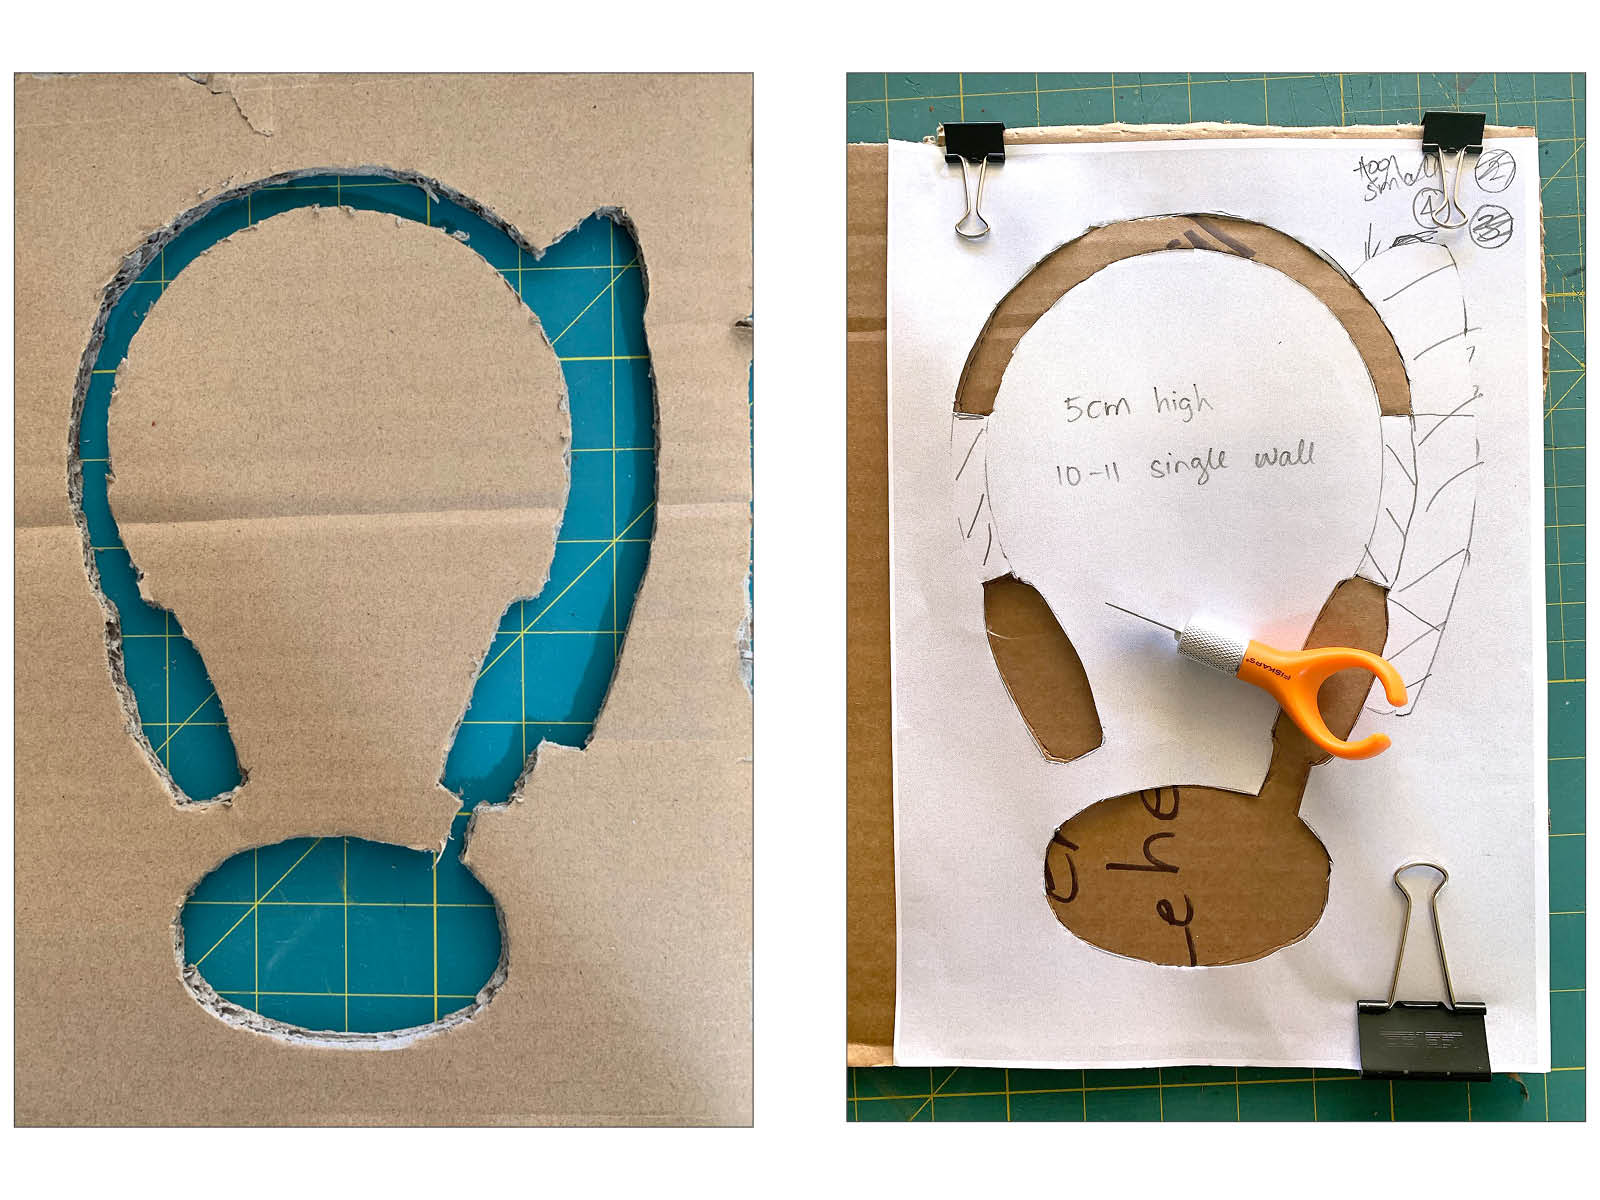
The photos below, in order from left to right, show the following stages:
- The first prototype cut out from corrugate and ready for testing.
- Preparing to cut the second shape on a scrap piece of corrugate.
- Checking the fit of the headset and cords.
- Cutting the headset out of the blue piece that will be on top of the corrugate stack.
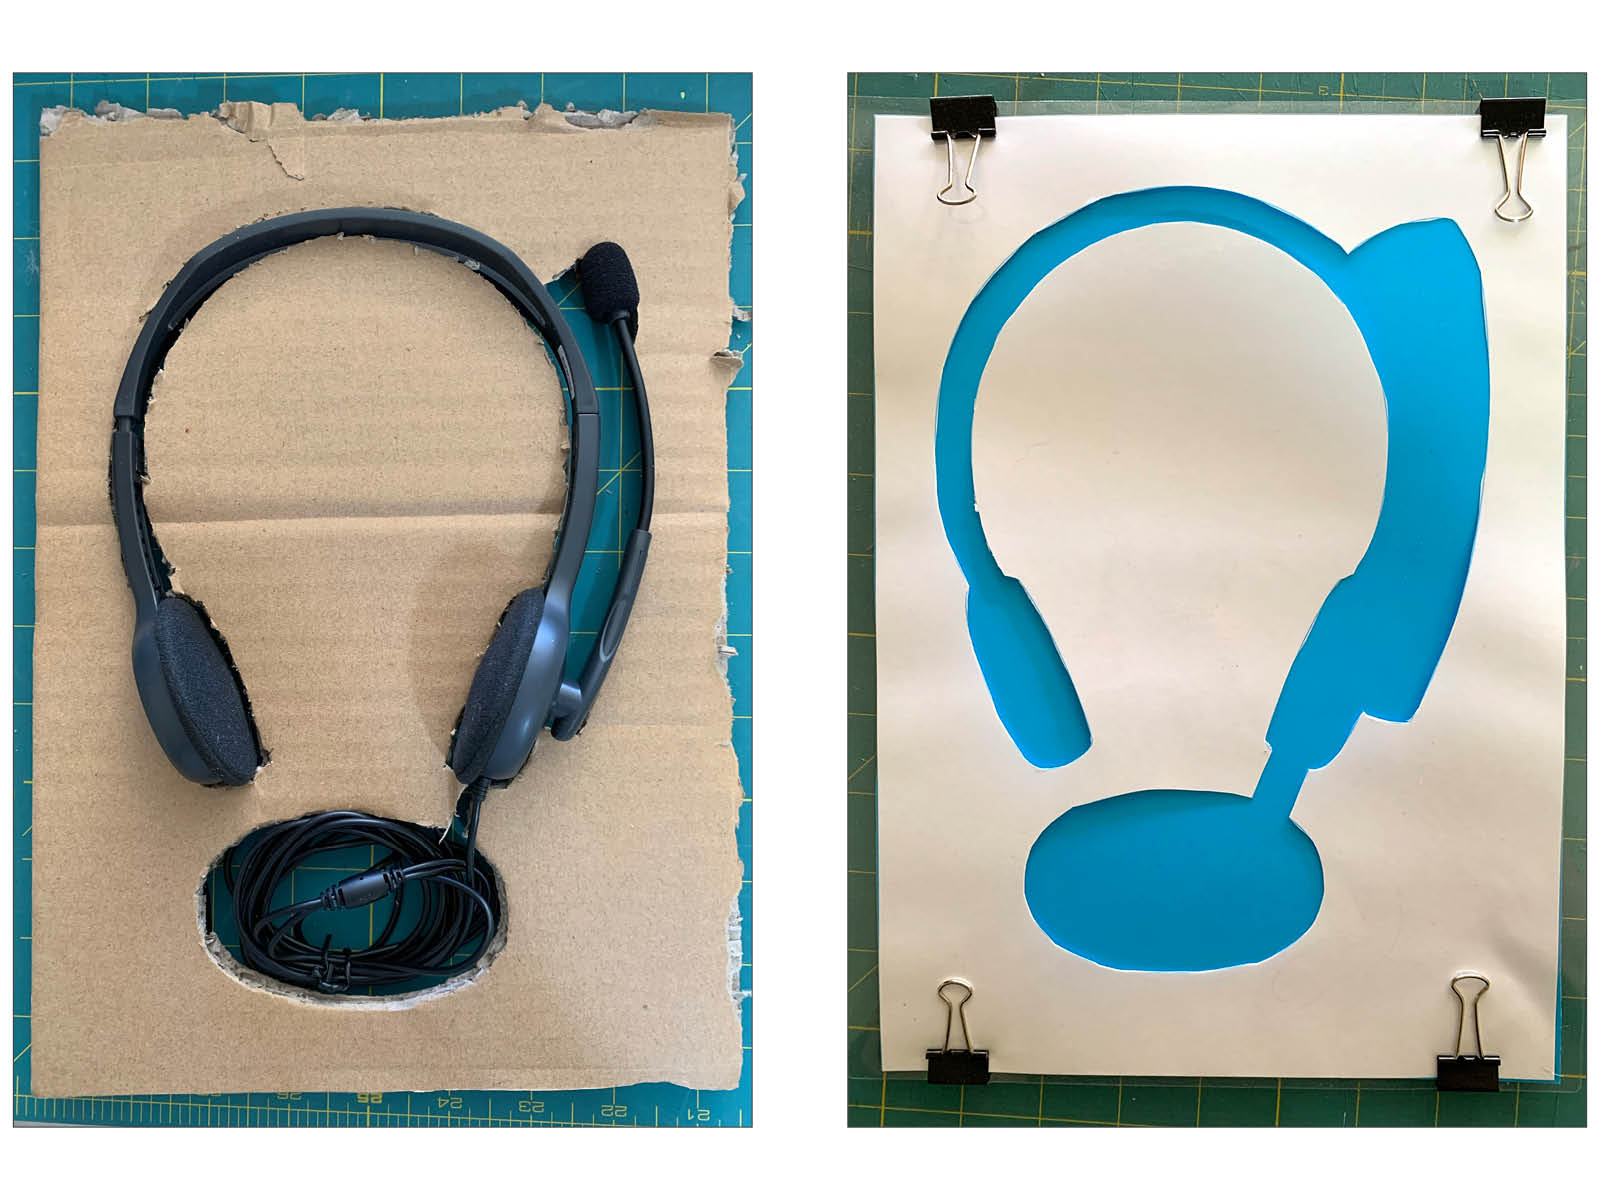
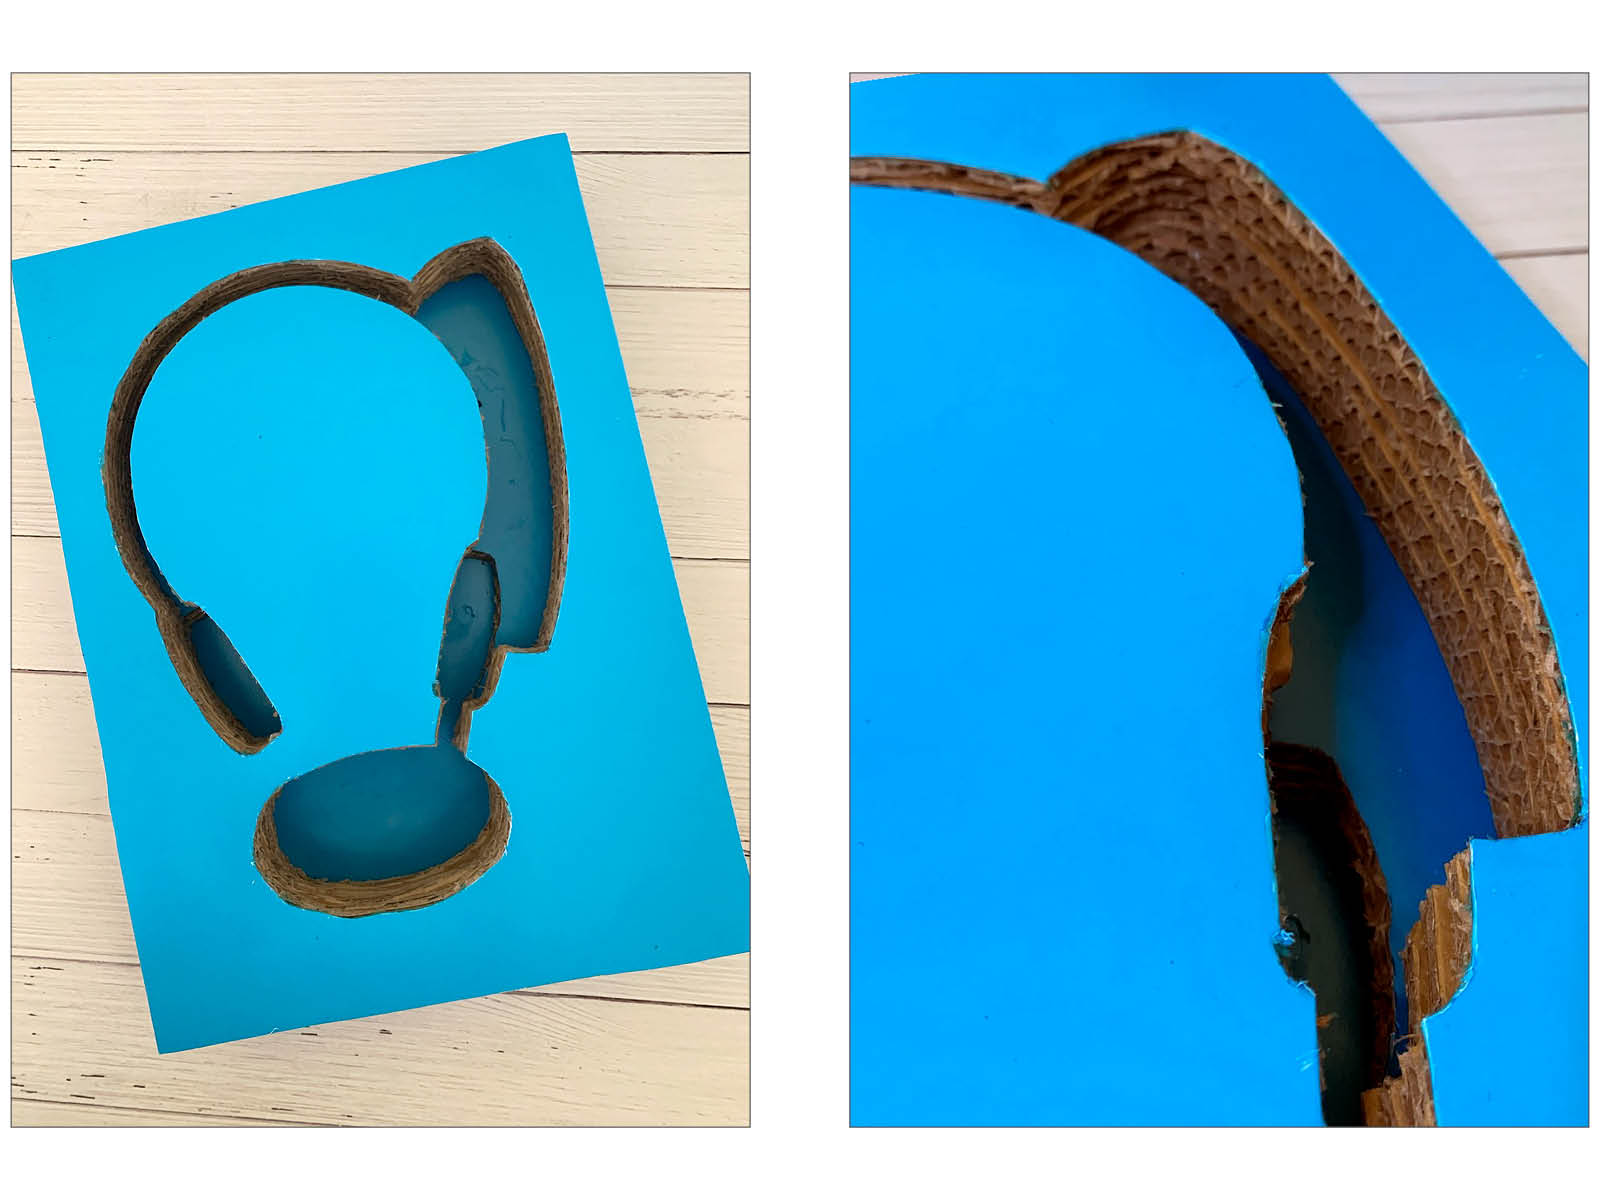
I cut the shapes out of 13 layers of corrugate and added the printed blue pieces to line the relevant slices within the corrugate stack, shown below left. This ensures that the ‘Logitech blue’ is shown throughout the depth of the stack when looking from above.
The two photos (below right) show the layered and glued corrugate stack. The second and third level layers – with the blue lining – are seen here from above in the finished stack.
Next I needed to design the outer packaging box to contain the corrugate stack. The photos below, in order from left to right, show the following stages:
- The inspiration for the dieline of the container box.
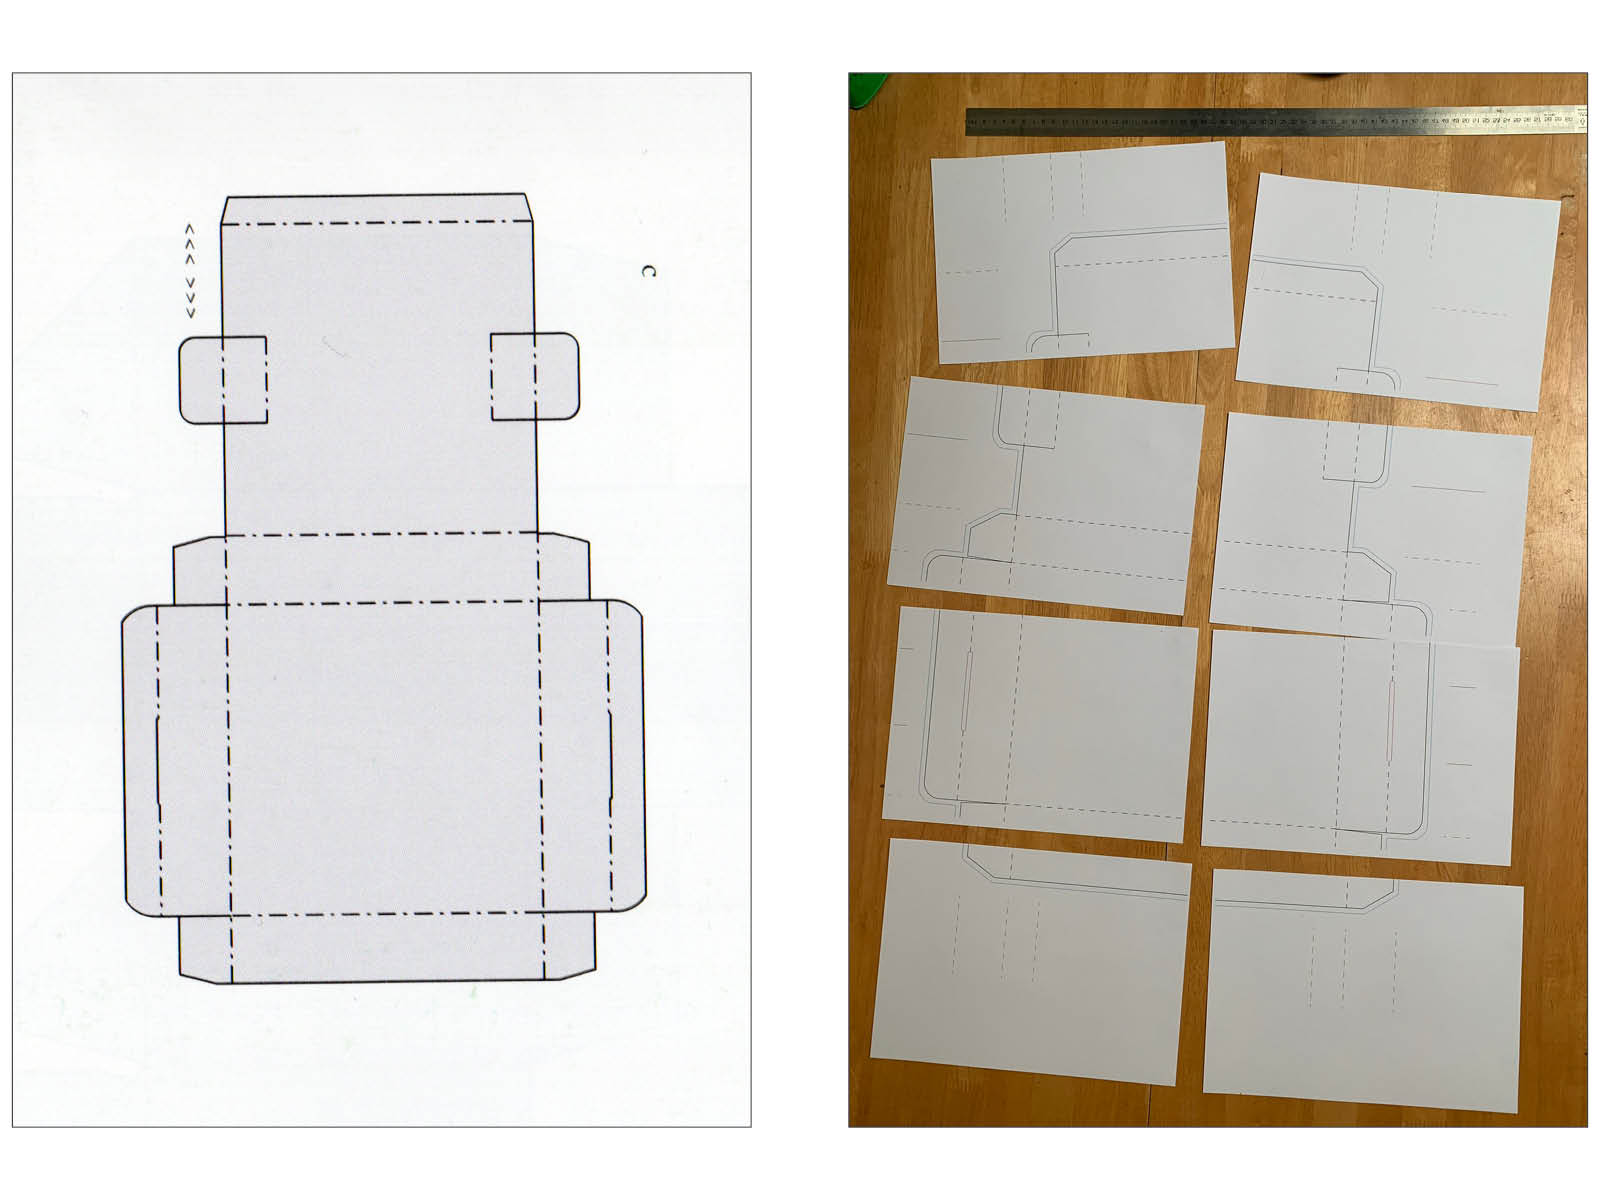
- Printing and taping tiled A4 sheets of the resized box design.
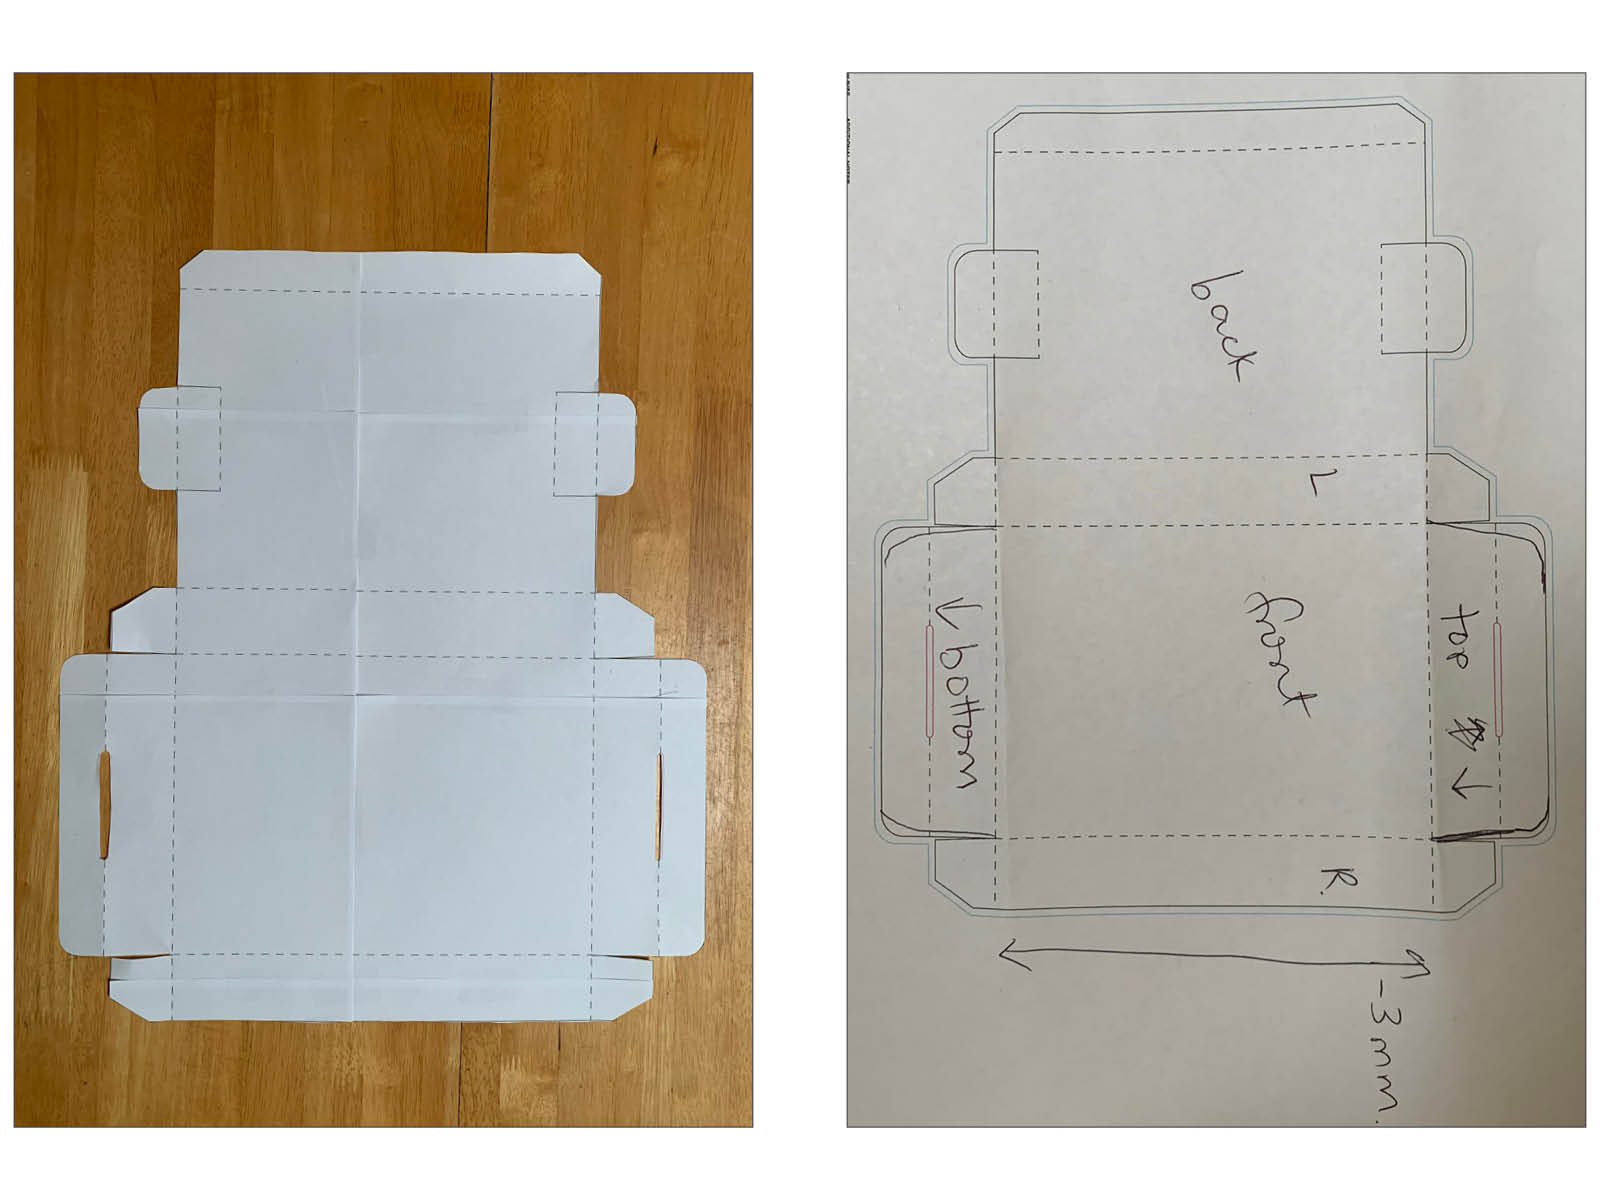
- The outer box prototype cut out and ready to fold and tape to check the sizing.
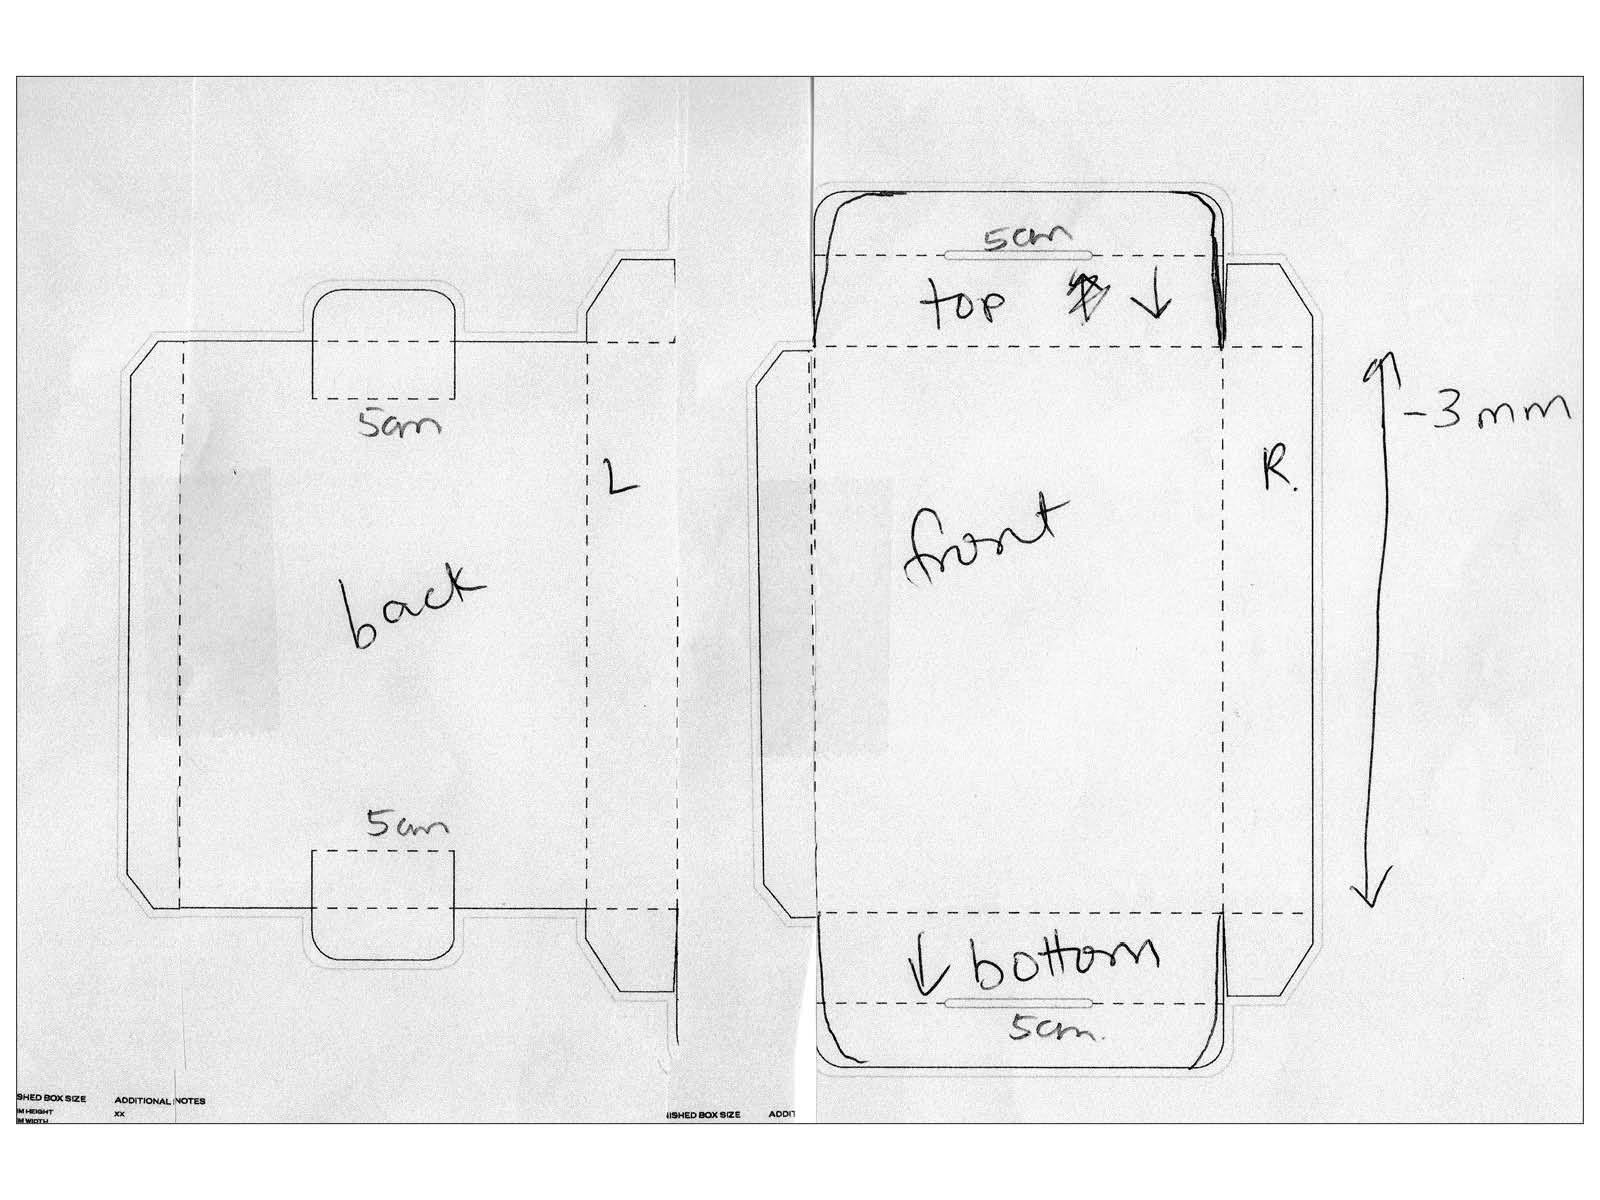
- Making notes and rough adjustments on a smaller version of the dieline.
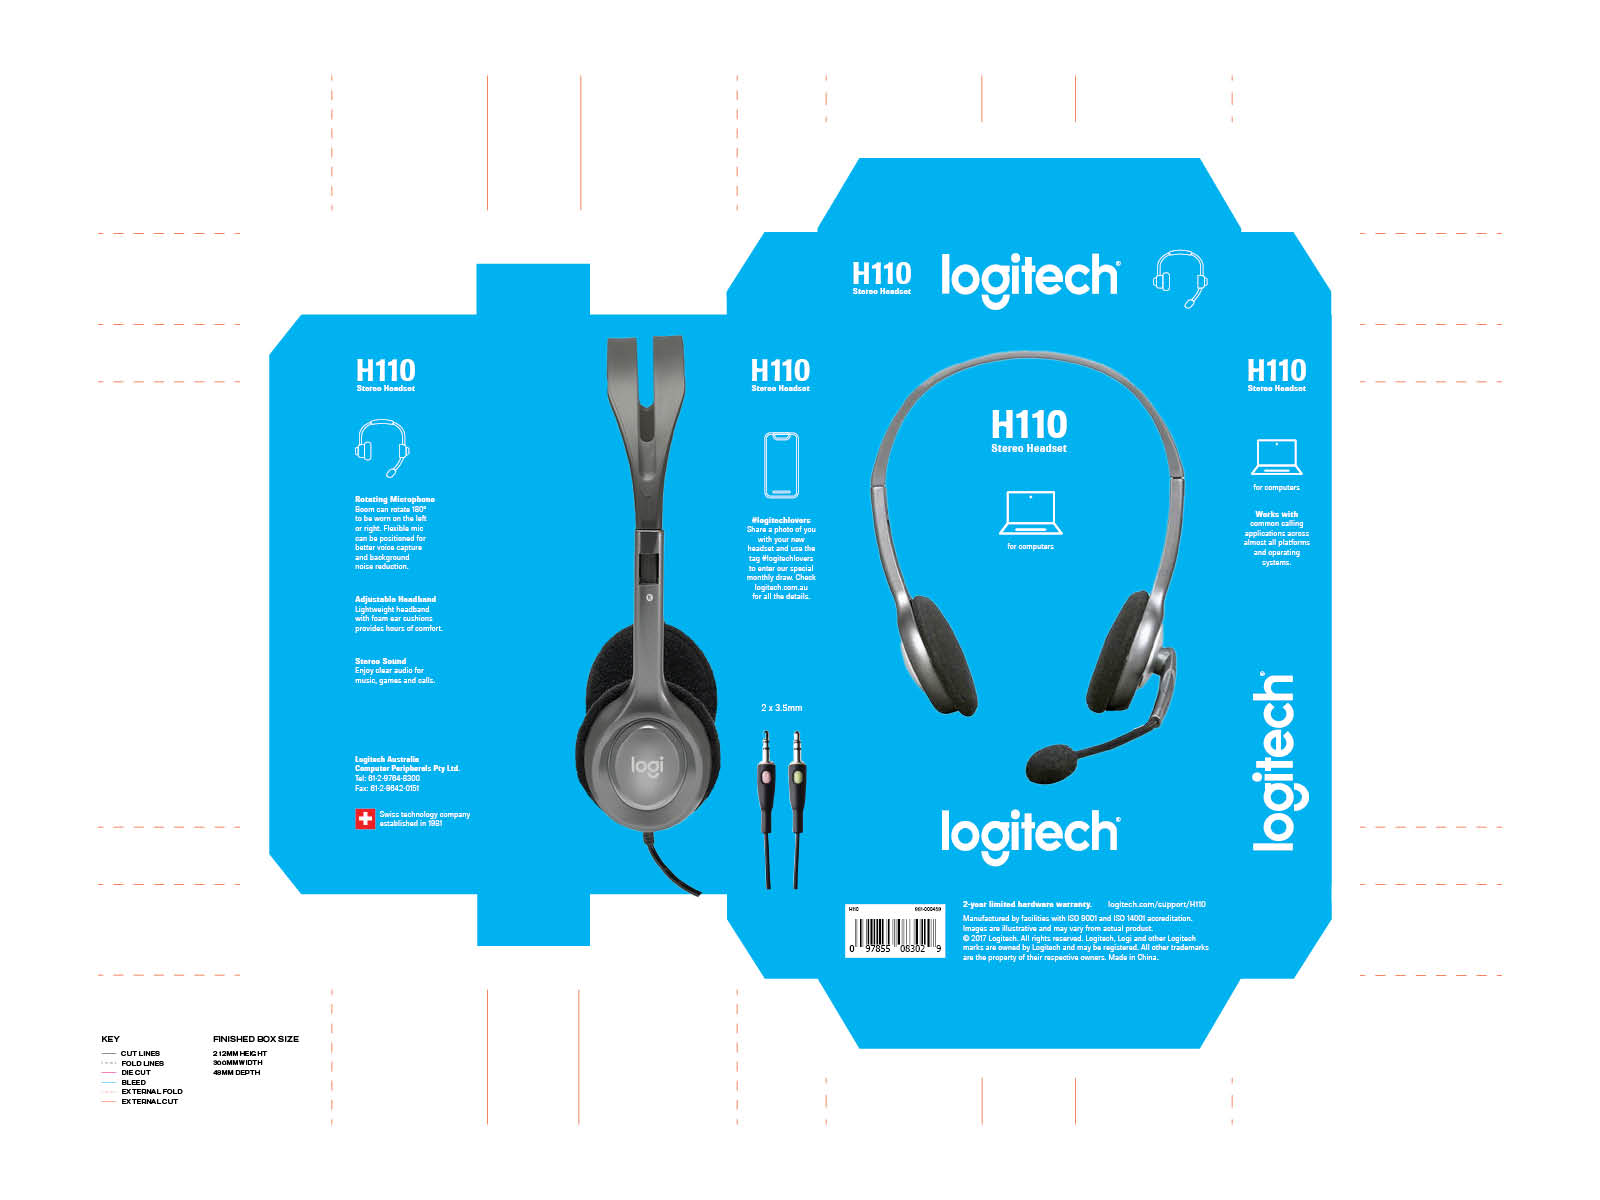
Once the dieline for the packaging box was correctly sized, the next job was designing and laying out the packaging box artwork with the logo, product images and required information. The images, below left, show the designs for the front, back, sides, top, and bottom pieces.
Below right is the completed A1 sized dieline for the outer packaging box, with the adjusted artwork placed. The artwork shows cut and fold lines outside the die – as this was a prototype for a university project, I was doing all the cutting myself so I made plenty of guidelines on the outside of the printed area to ensure there were no errors in the construction stage.
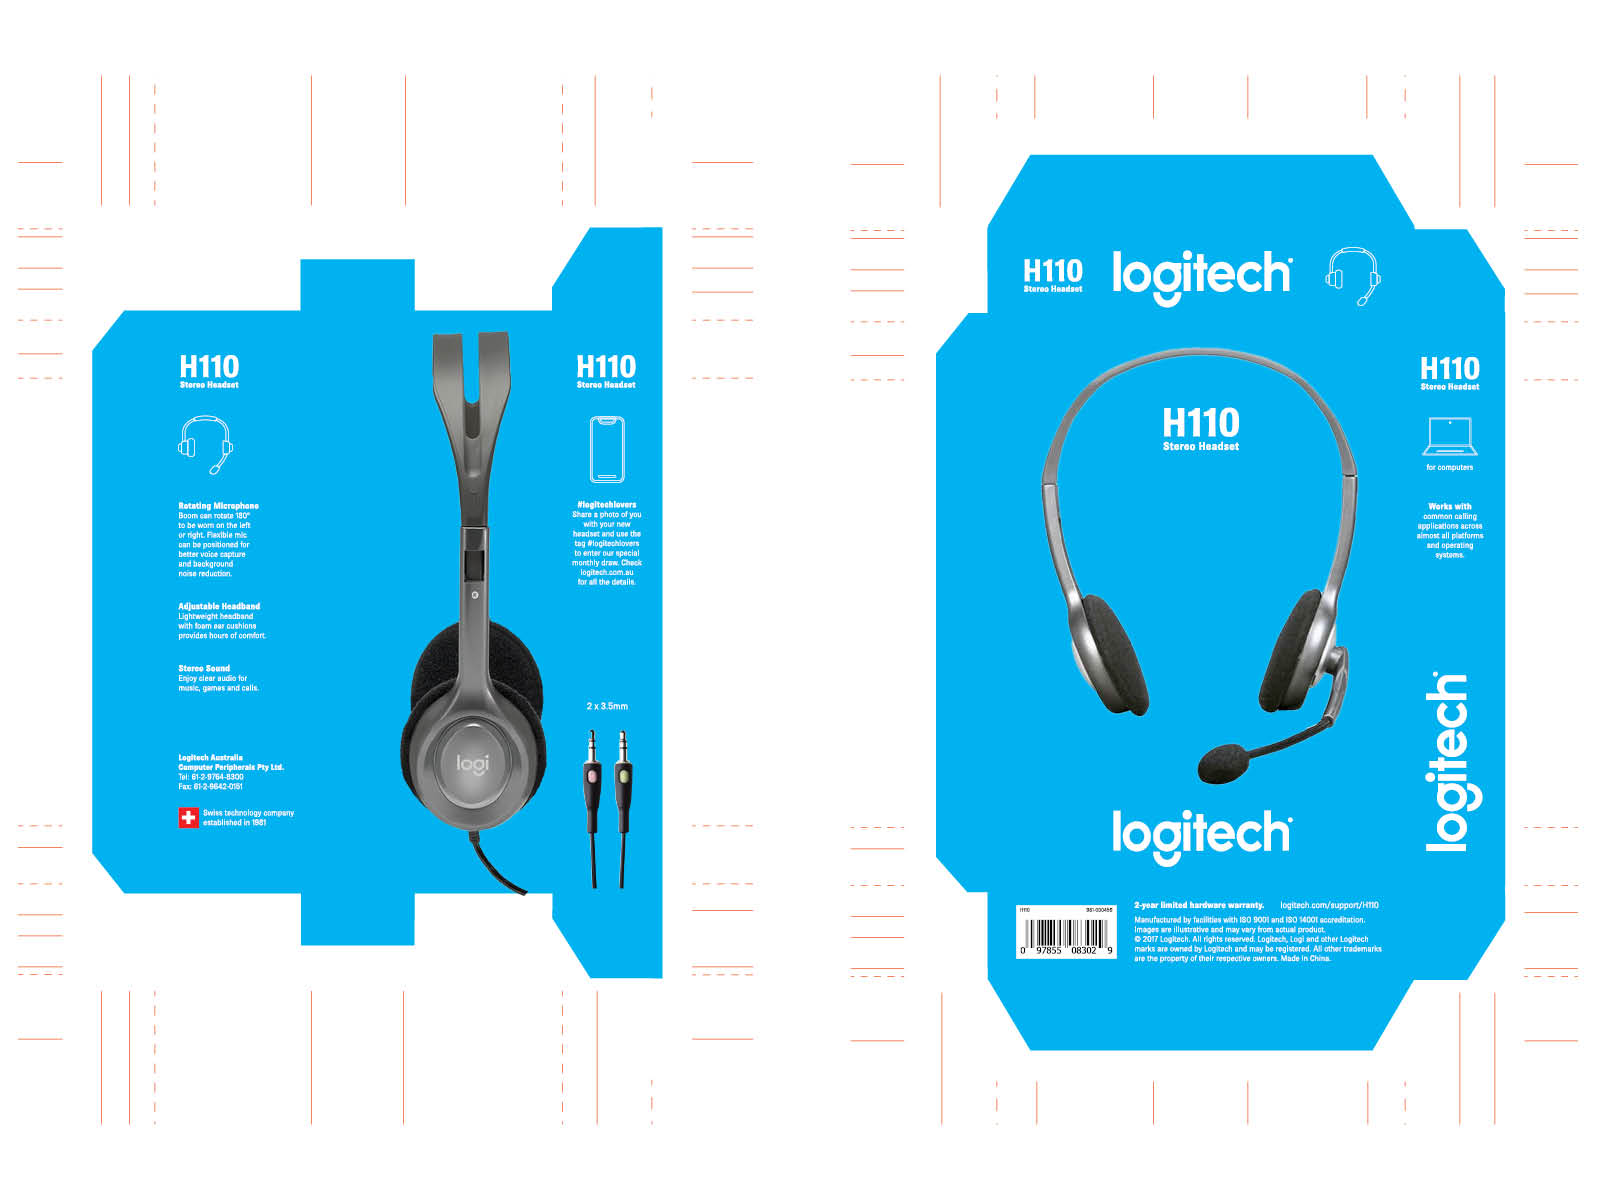
Then I began seeking quotes to have my A1 piece professionally printed, but I soon found that many local printers were not set up to do A1 printing and it would be very expensive. My solution was to redesign the packaging net so that it would fit over two A2 sized pieces instead, and this proved more economical and practical for printing locally without taking anything away from the outcome.
The shots below show the process of cutting the paper prototype into two parts, and making adjustments to add an extra tab to glue the two sections together at the side. I checked and refined the prototype again, then went back to Illustrator to adjust the design of the dies to fit on two pieces of A2 size stock. The new dies are shown on the right with the artwork added, and showing the adjusted cut and fold lines outside the die to assist with construction.
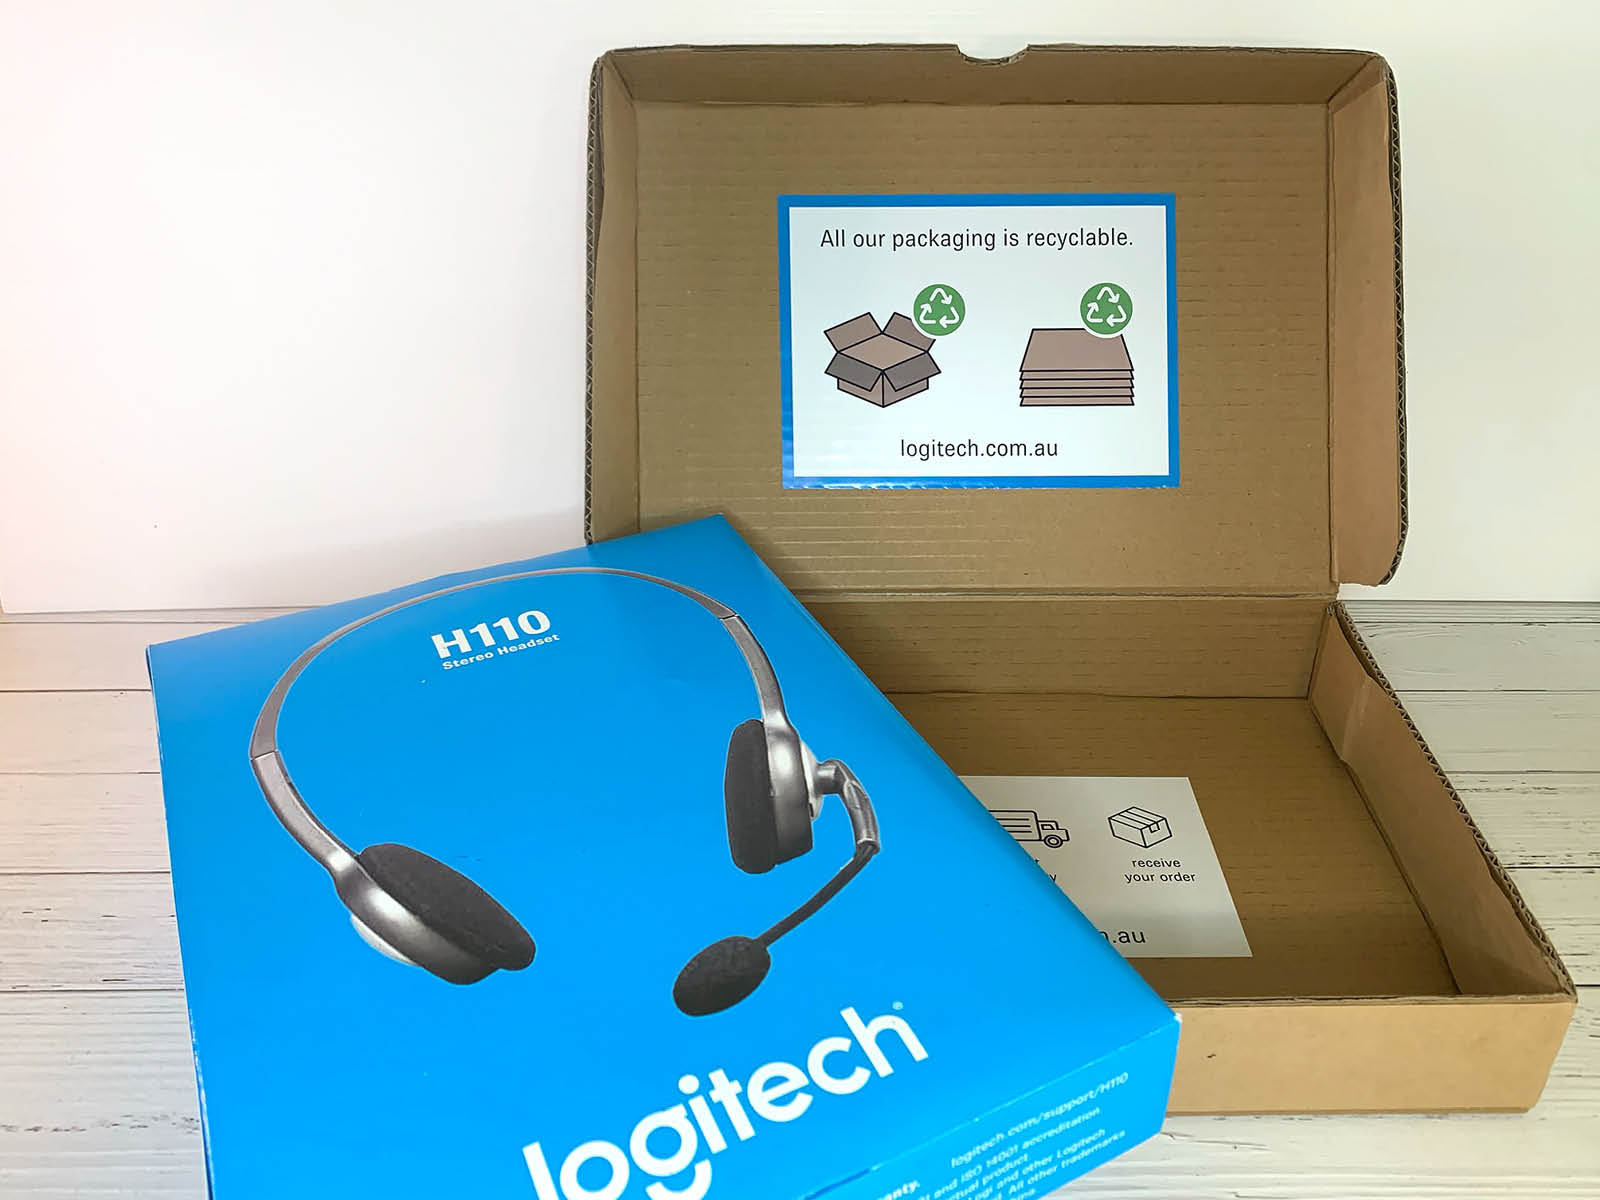
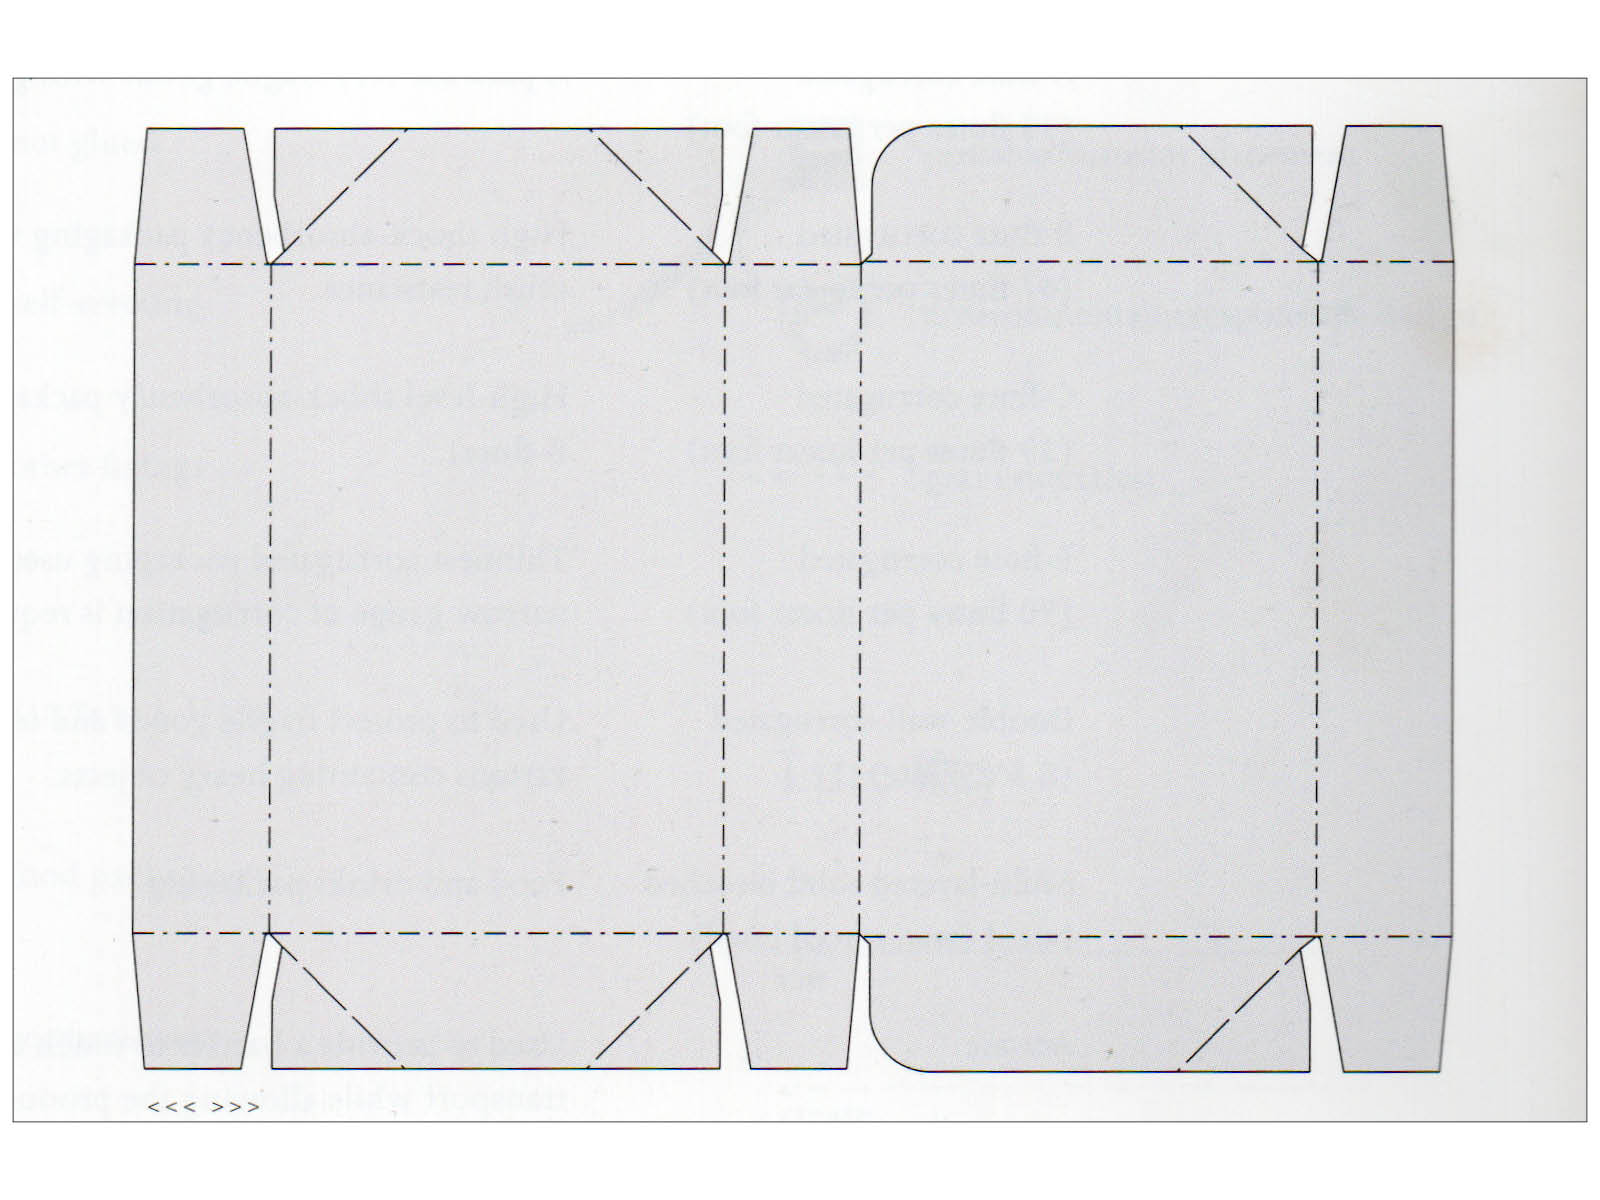
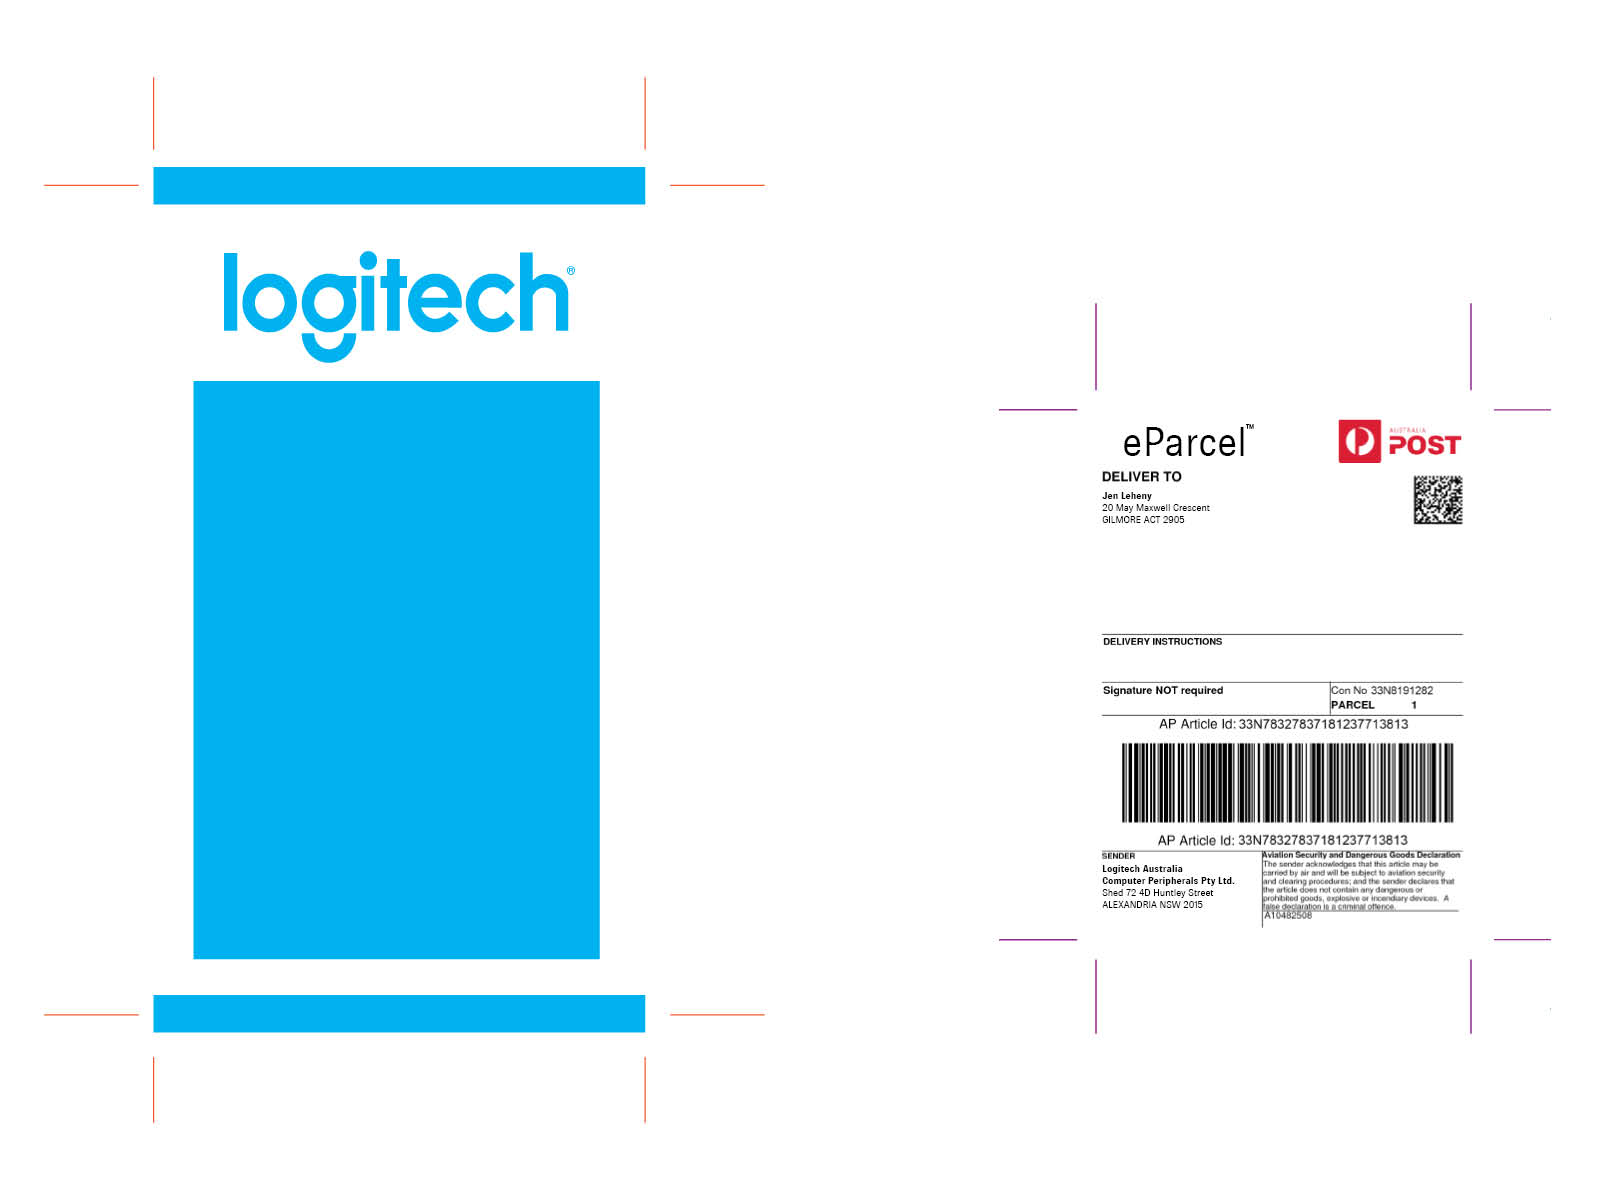
Next was the design of the cardboard mailing box itself, as well as the associated labels for posting.
On the left, is the inspiration for the design of the shipping box. On the right, the correctly sized shipping box dieline was printed onto tiled A4 sheets, clipped to a piece of corrugate, cut, scored, folded, and assembled to check and adjust the sizing and design.
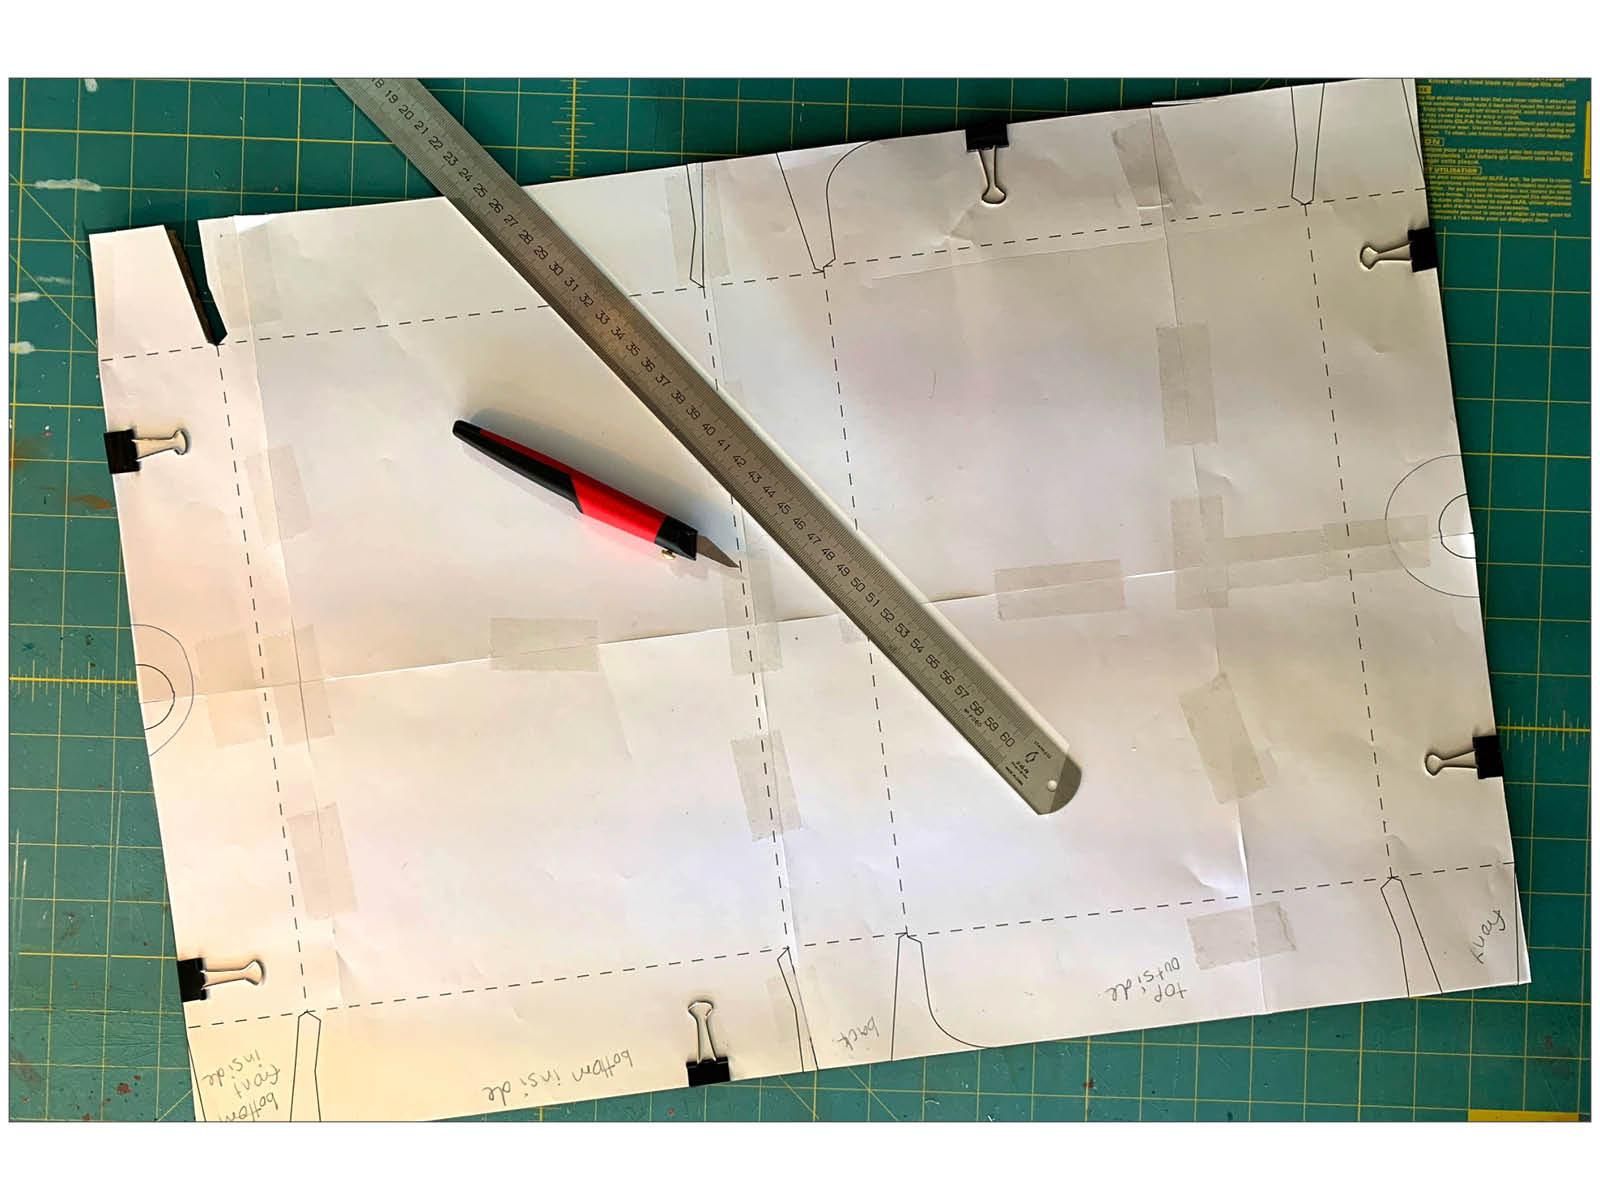
Below left is the assembled prototype of the shipping box after cutting it out. The tabs are glued and clipped together.
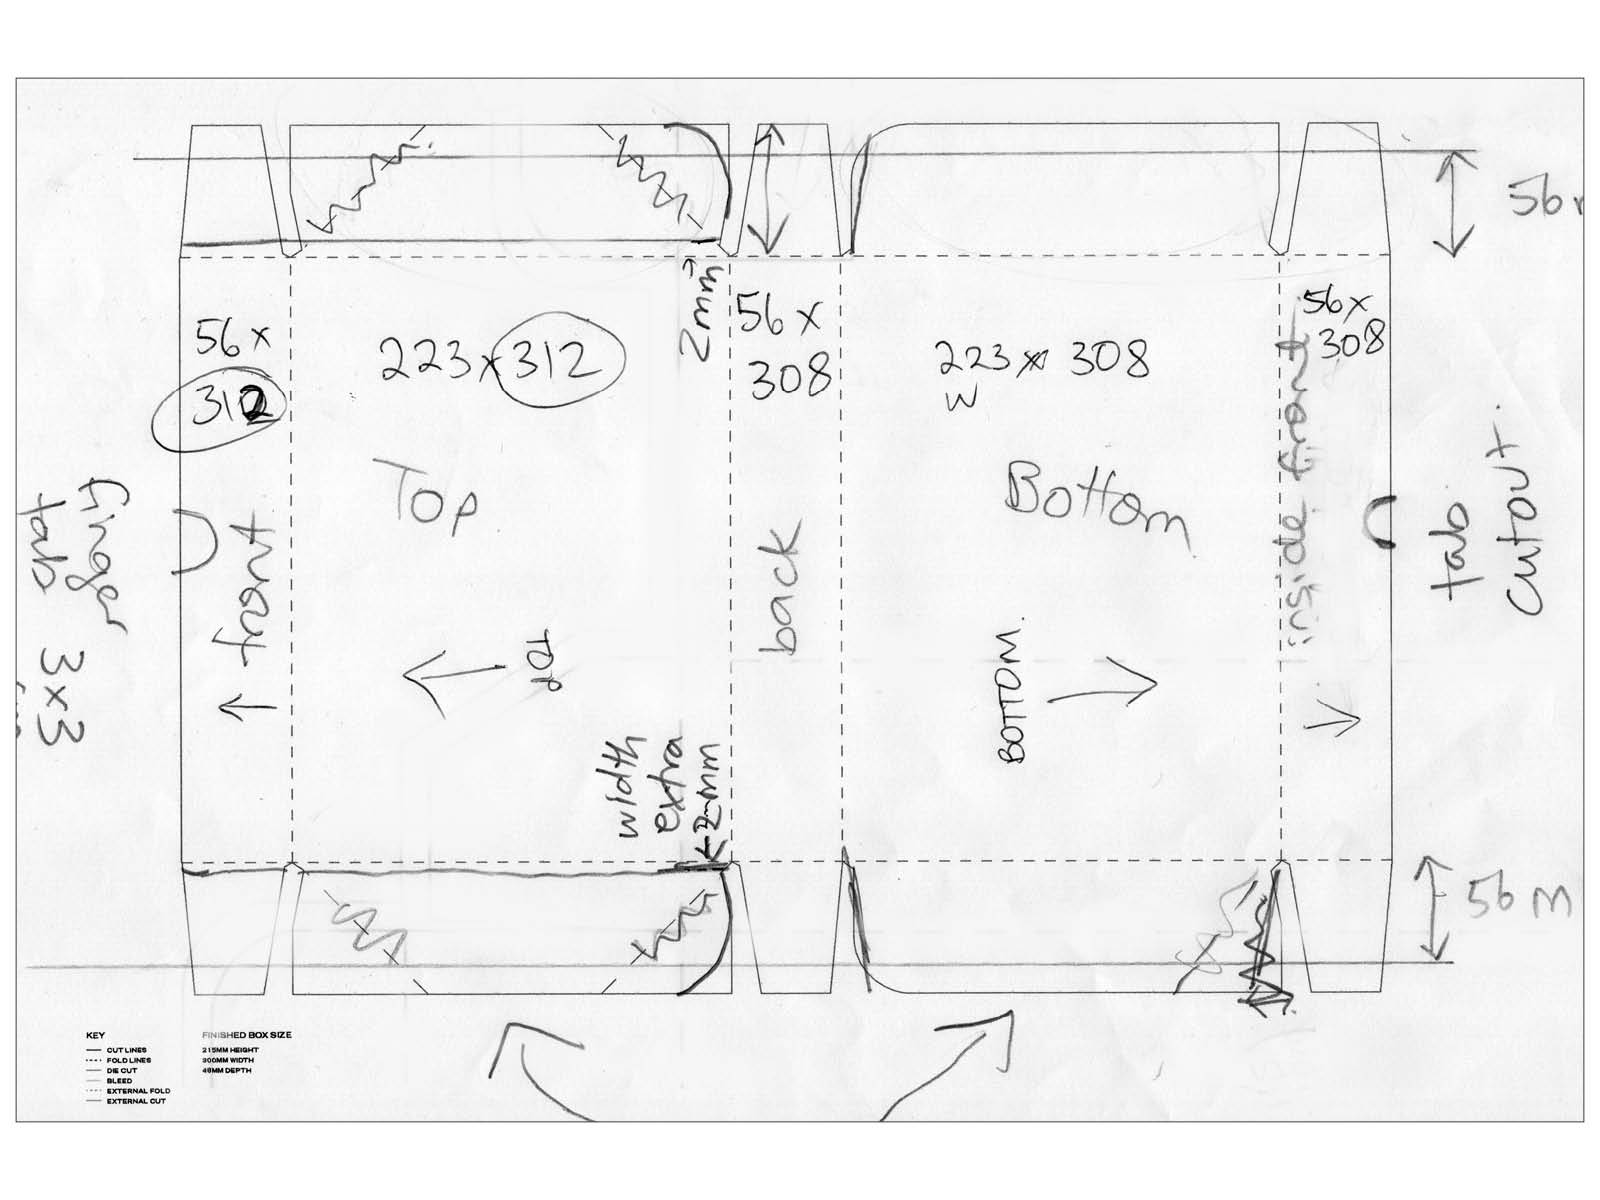
From here, I had quite a few adjustments to make to the design as shown below right, with the adjustments noted on a smaller version of the shipping box dieline. 2mm was also added to the top and front to allow easy closure of the box, due to the thickness of the corrugate, which I had neglected to take into account when assembling my paper model.
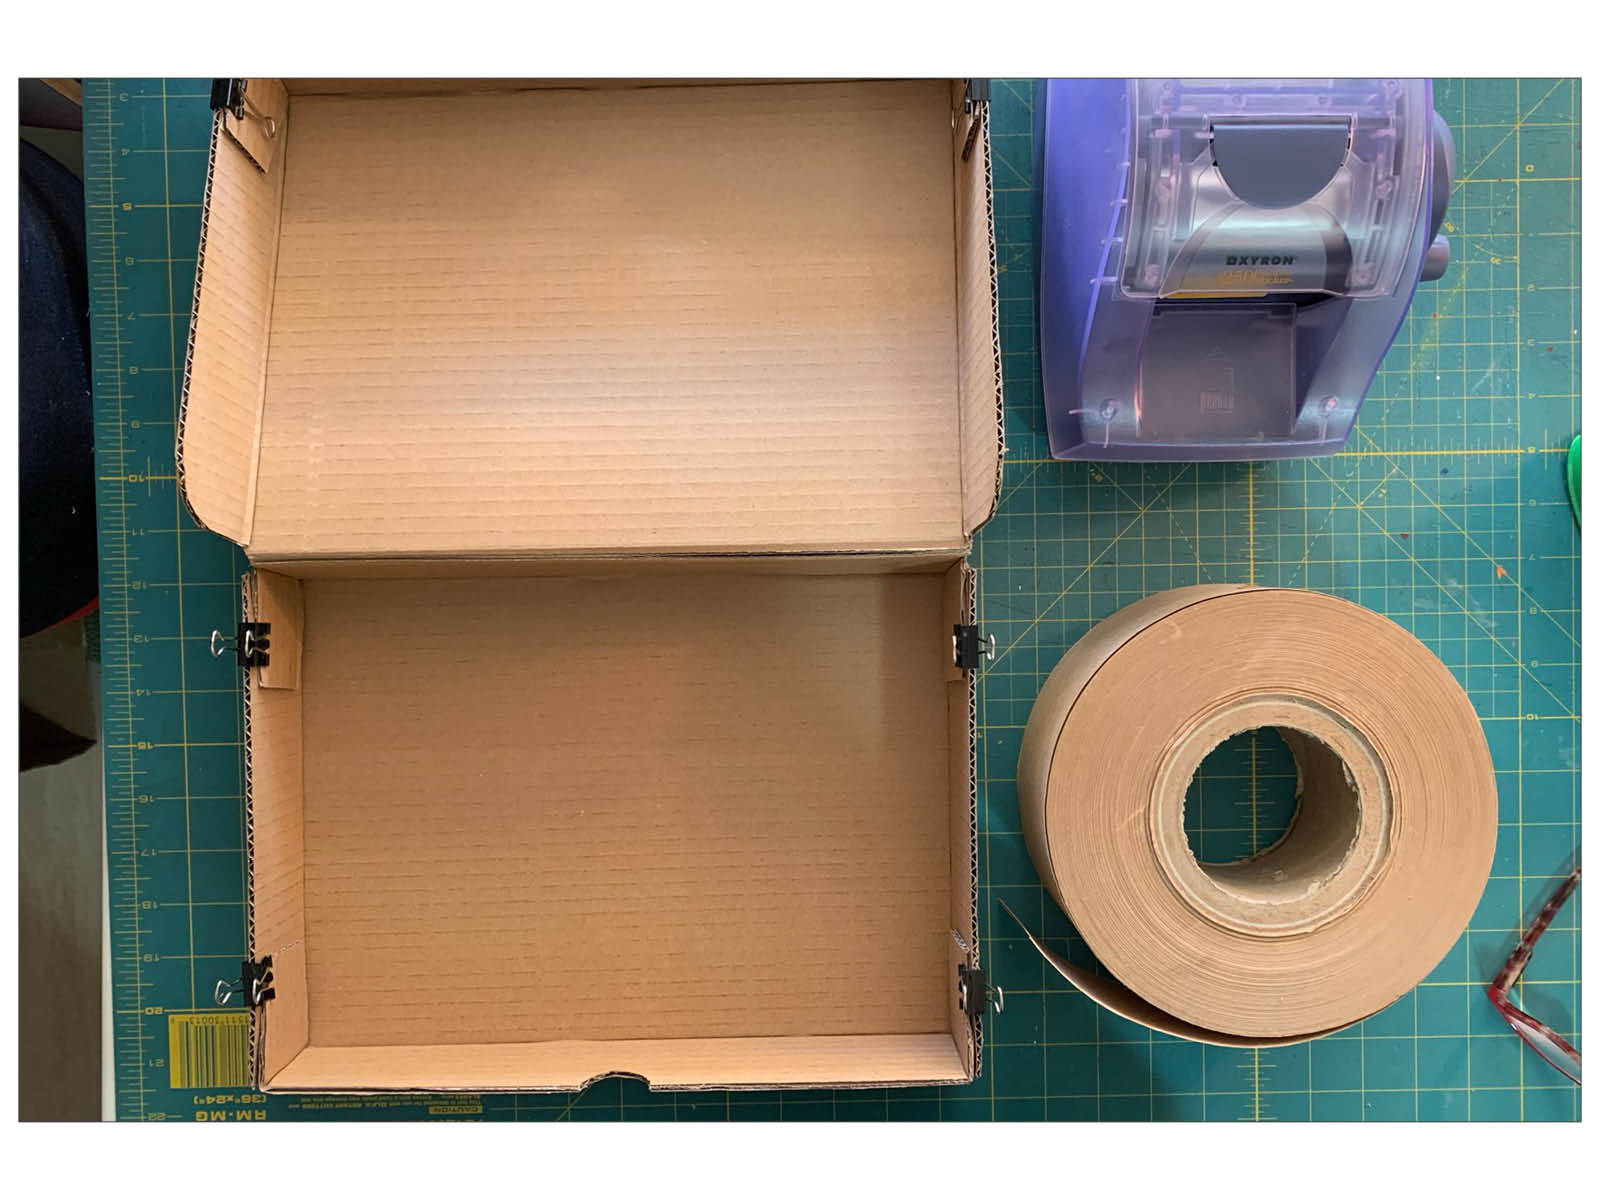
With the prototype of the shipping box finalised, I went back to Illustrator to clean up the file. Then I printed it onto tiled A4 sheets, clipped it to the corrugate, cut it out, and assembled it again to check the fit. This time everything was correct, and I could move on to the design for the outside and inside of the shipping box.
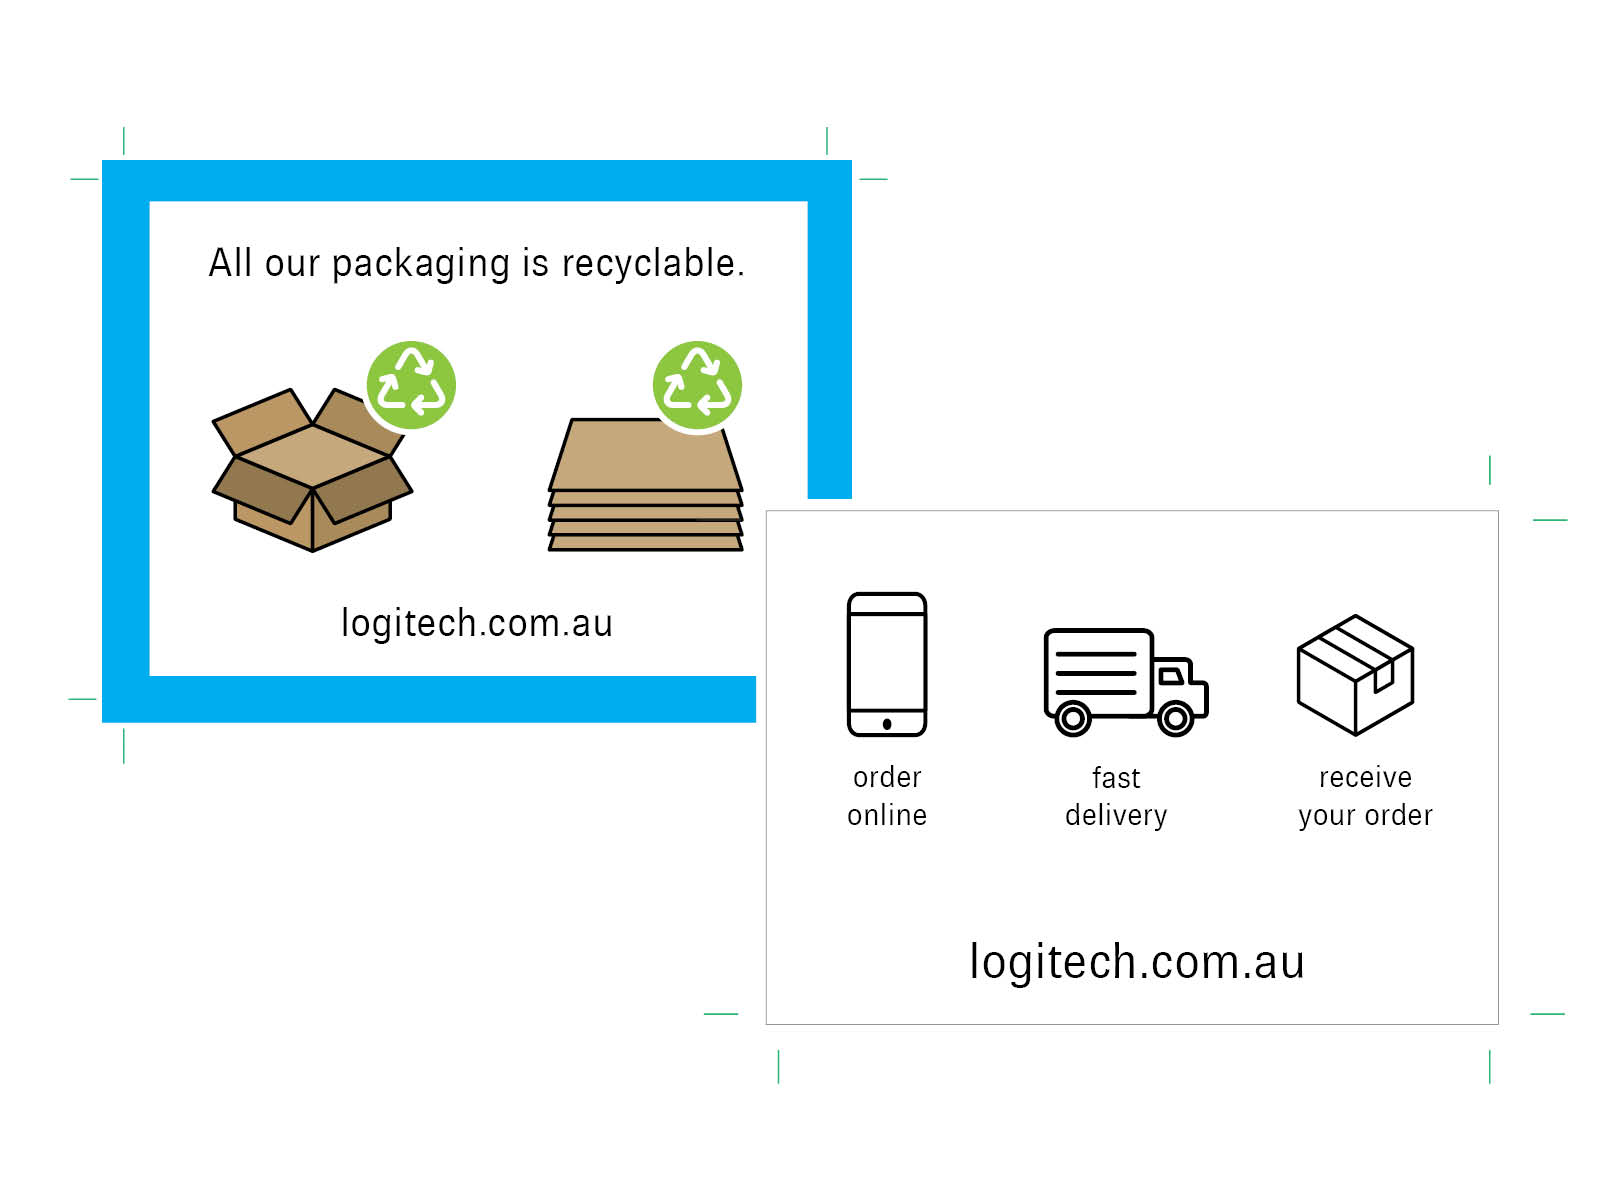
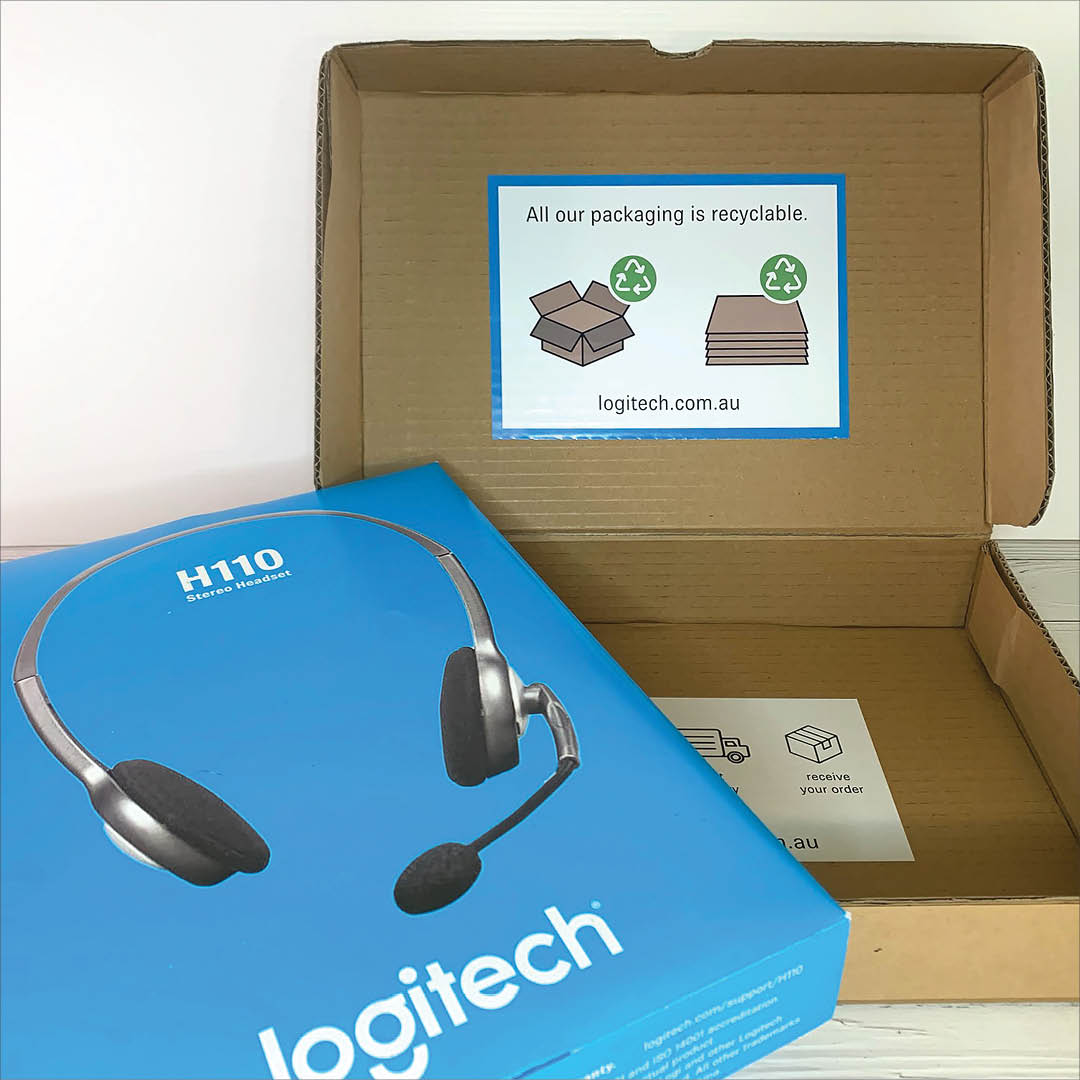
Below left is the design for the outside top of the shipping box (blue piece) with the shipping label. Below right are two adhesive labels that I placed inside the shipping box. The one with the blue border (‘All our packaging is recyclable’) went on the inside top, with the other one on the inside bottom of the shipping box.
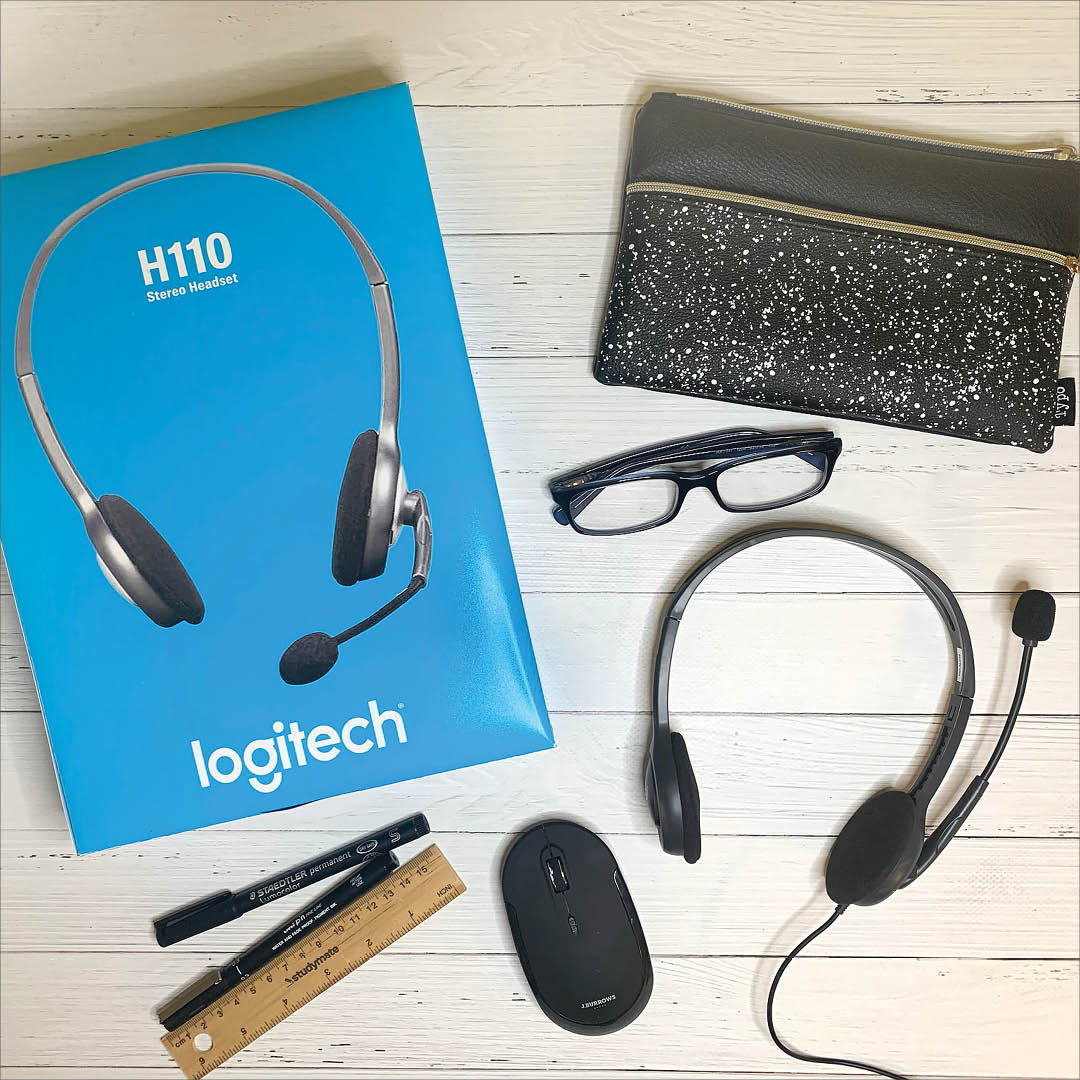
Below is the completed project with all the deliverables shown – I redesigned both the primary and secondary packaging for the product, and designed a shipping box for a sustainable packaging solution for the Logitech H110 Headset.
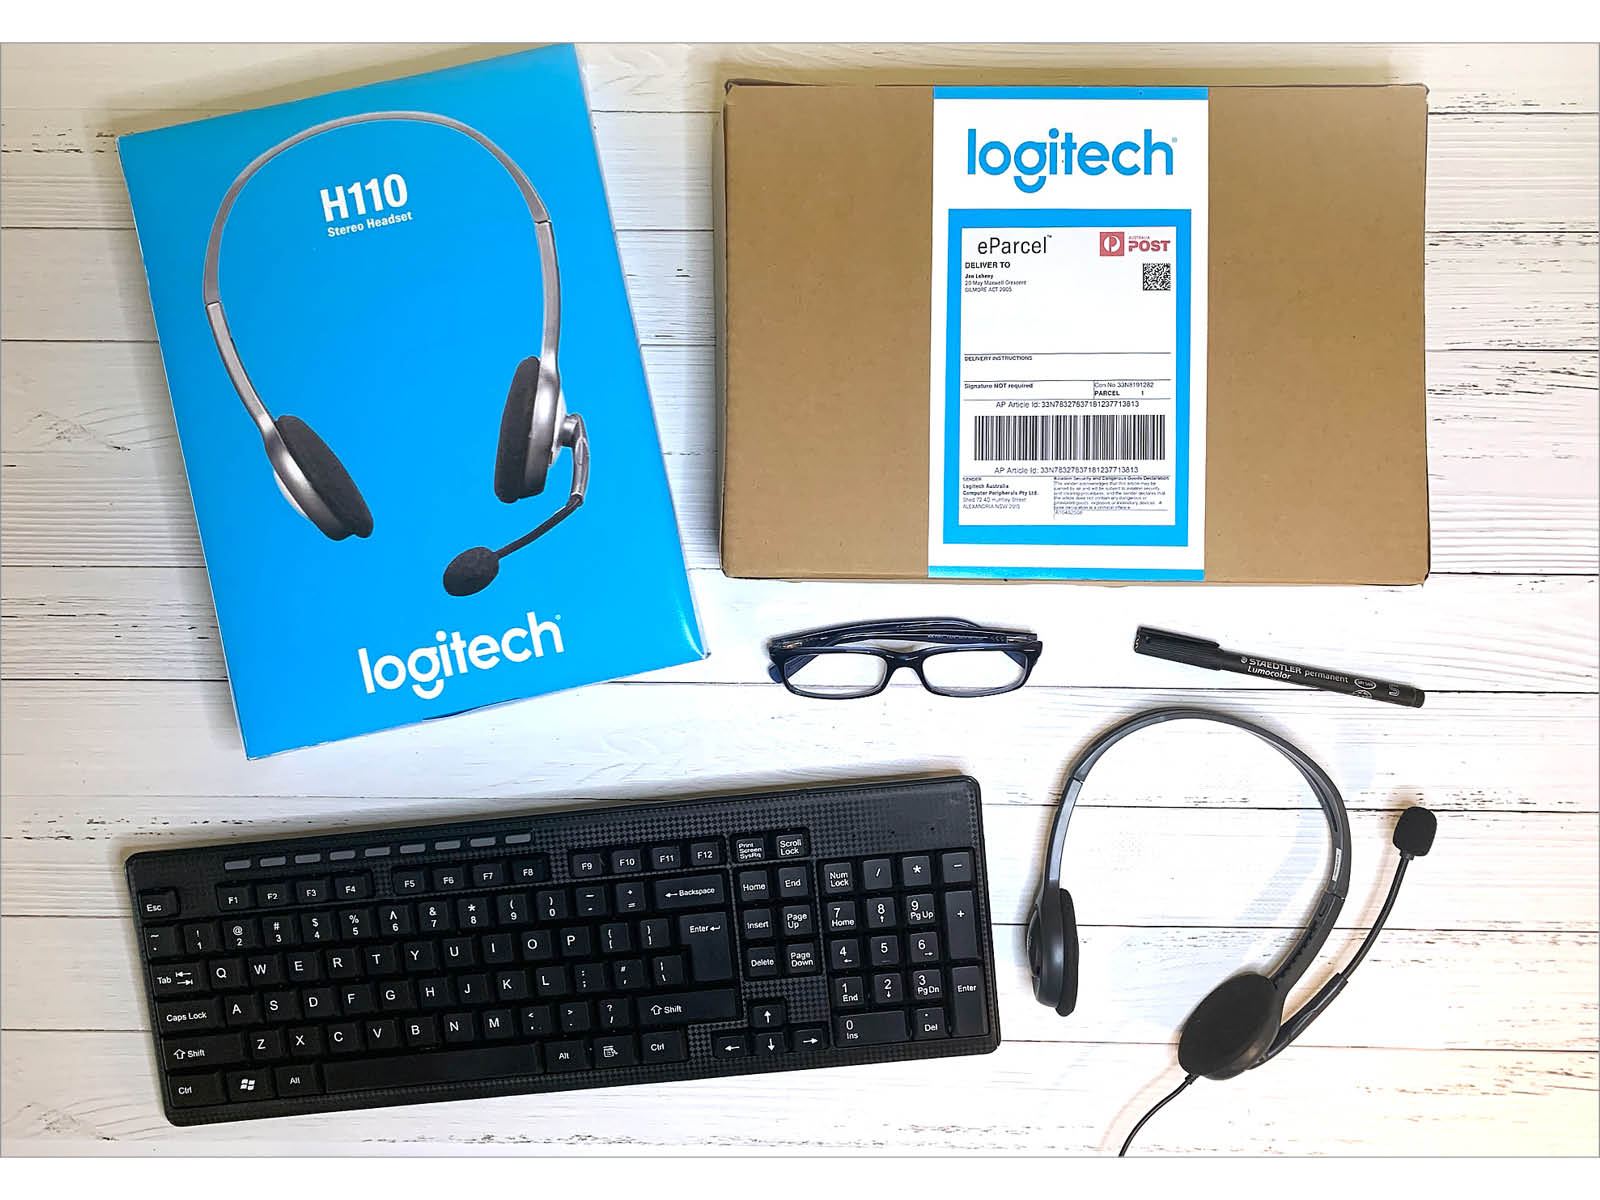
The original packaging for the Logitech H110 Headset had multiple pieces of injection molded PET plastic. The new packaging has a much lower impact on the environment throughout its life cycle, and meets all of the environmental goals of the redesign project. Every element of the redesigned packaging is constructed from card or corrugate, featuring minimal gluing and making use of brown paper tape to line the shipping box. The entire packaging solution, including the shipping box, is easily recyclable and will break down in the natural elements if not recycled by the consumer.
Multiple layers of corrugate have been cut to fit the headset, then stacked and glued to form a robust housing. The headset is protected and supported both in store and in transit, and the finished point of sale rectangular box is easily stackable and eye catching on the shelf. The corrugate solution complements the market positioning and price point of the product (which is at the affordable end of the market, retailing for $39) and the emphasis on corrugate gives the consumer a positive perception of the brand and ecological aims of the company.
I hope you enjoyed seeing the complete process that went into this sustainable packaging redesign project for a university assignment in Packaging Design and Communication at the University of Canberra.
Case Study: ‘Logitech Headset Sustainable Packaging Redesign Project’ by Jen Leheny.